Full disclosure: I’m not doing the big reveal with all the furniture and decorative bits and the really cool fun parts in this post. But – stay with me! You’re going to get to see some parts of the house that haven’t been seen in at least 45 years – and maybe not even then. I mean, this is big. BIG.
Part III of The Never Ending Study brings us to the wall and ceiling finish. The floors were a big change for the room, but the walls and ceiling – holy cats! Just WAIT!
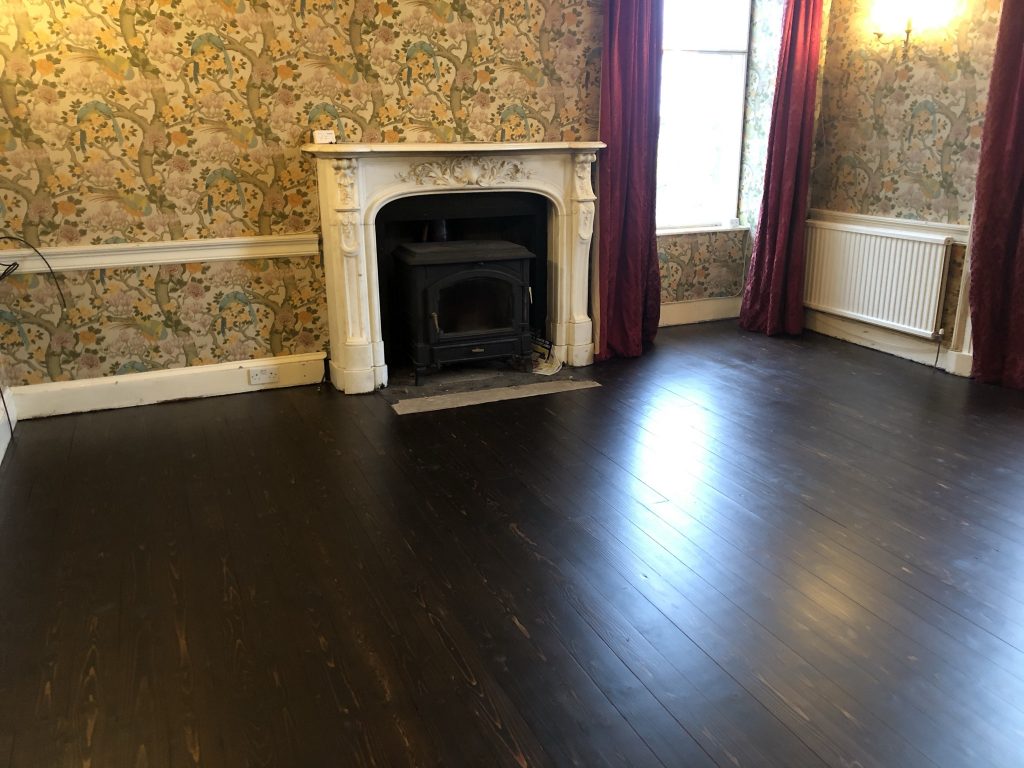
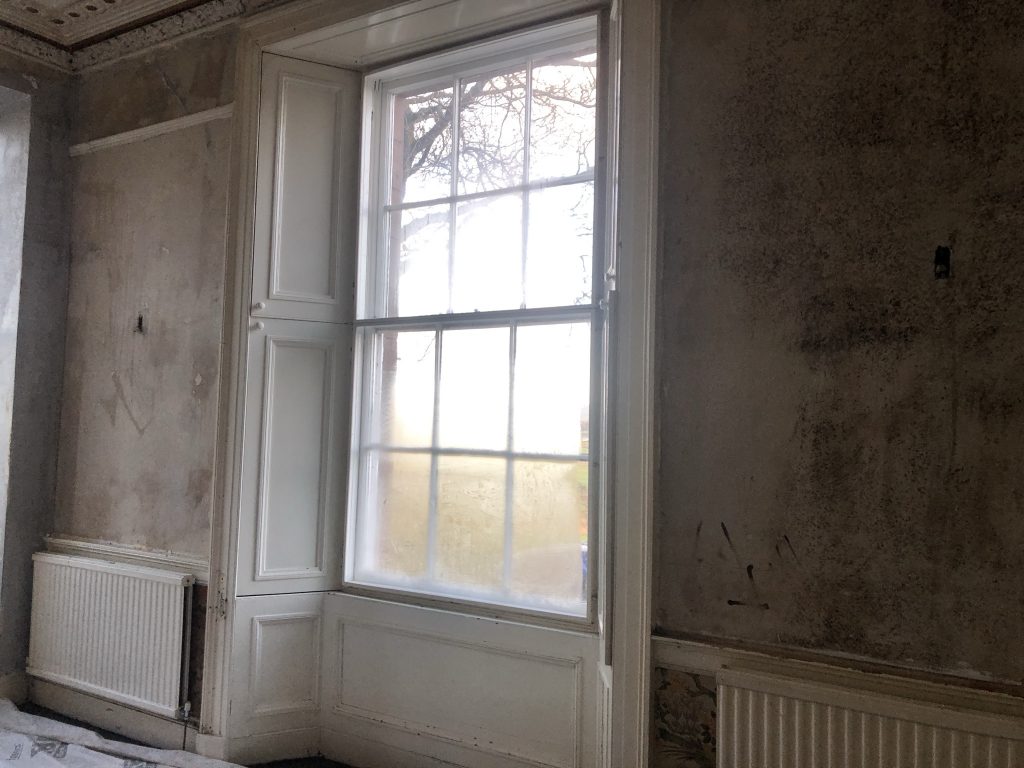
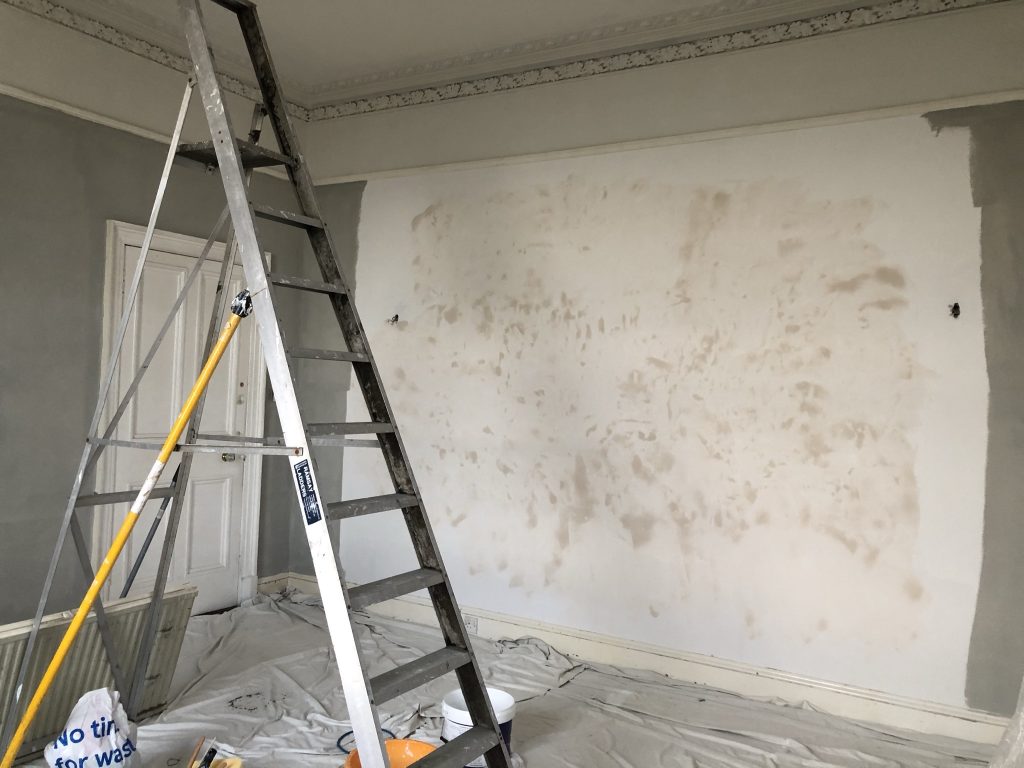
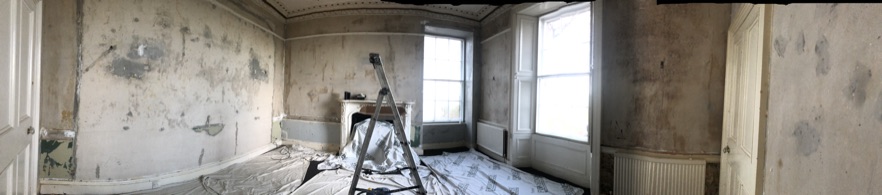
So, we all remember what the room looked like before, yes? Just in case that answer was a no, here you go – a refresher:

Obviously, we have quite a bold Morris wallpaper print going on here. We also have some gold trimmy bits on the coving. Ignore the carpet – that’s sorted. If you don’t remember where we left off following the floor work, voila, another refresher:
So, what does this project actually entail? Let’s dig into the walls and ceiling. I’ll cut to the chase and tell you what we did first, and then give you a bunch of photos to check out.
First, the ceiling needed to be filled and repainted. It had a bunch of cracks and staining (presumably, it had been some time since that was last done), so we wanted to freshen it rather than just do the walls.
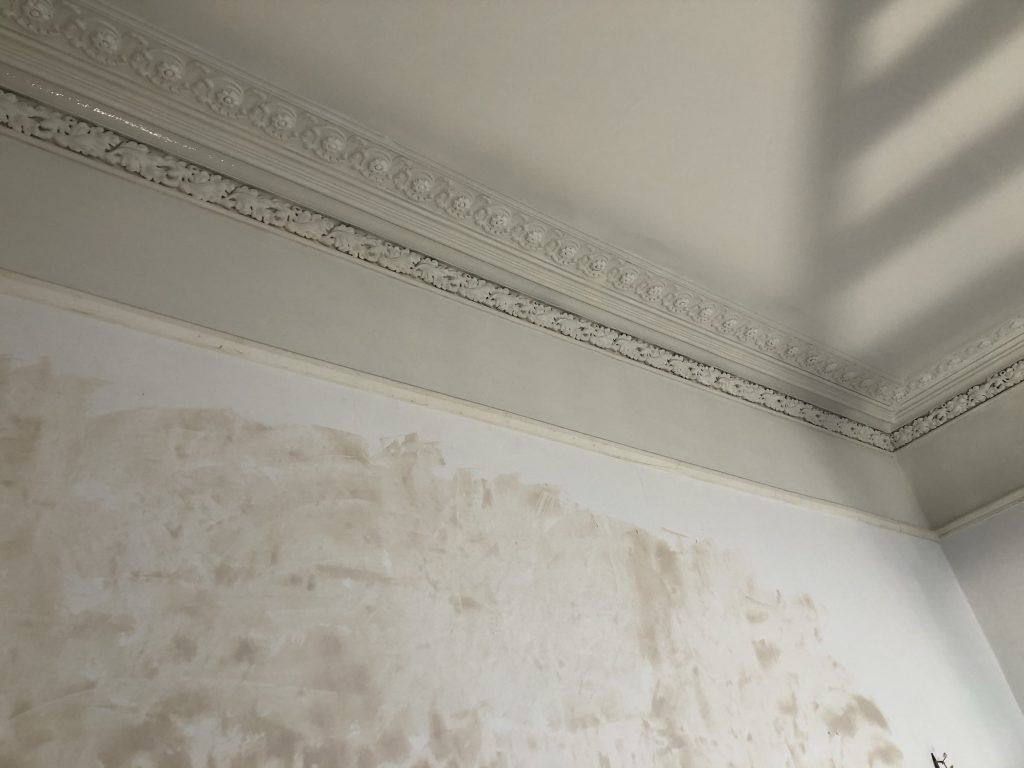
Importantly, the coving (or cornicing, depending on where you’re reading from) needed a special touch. The coving is original – circa 1830 – and has a lot of very fine detail. We were afraid to go after it with a brush like one normally would for fear of clogging up that detail, so we settled on having it sprayed for us by a professional. Sometimes, in DIY and renovation, it’s important to know your limits – and ruining nearly 200 year old plasterwork is where I draw the line!
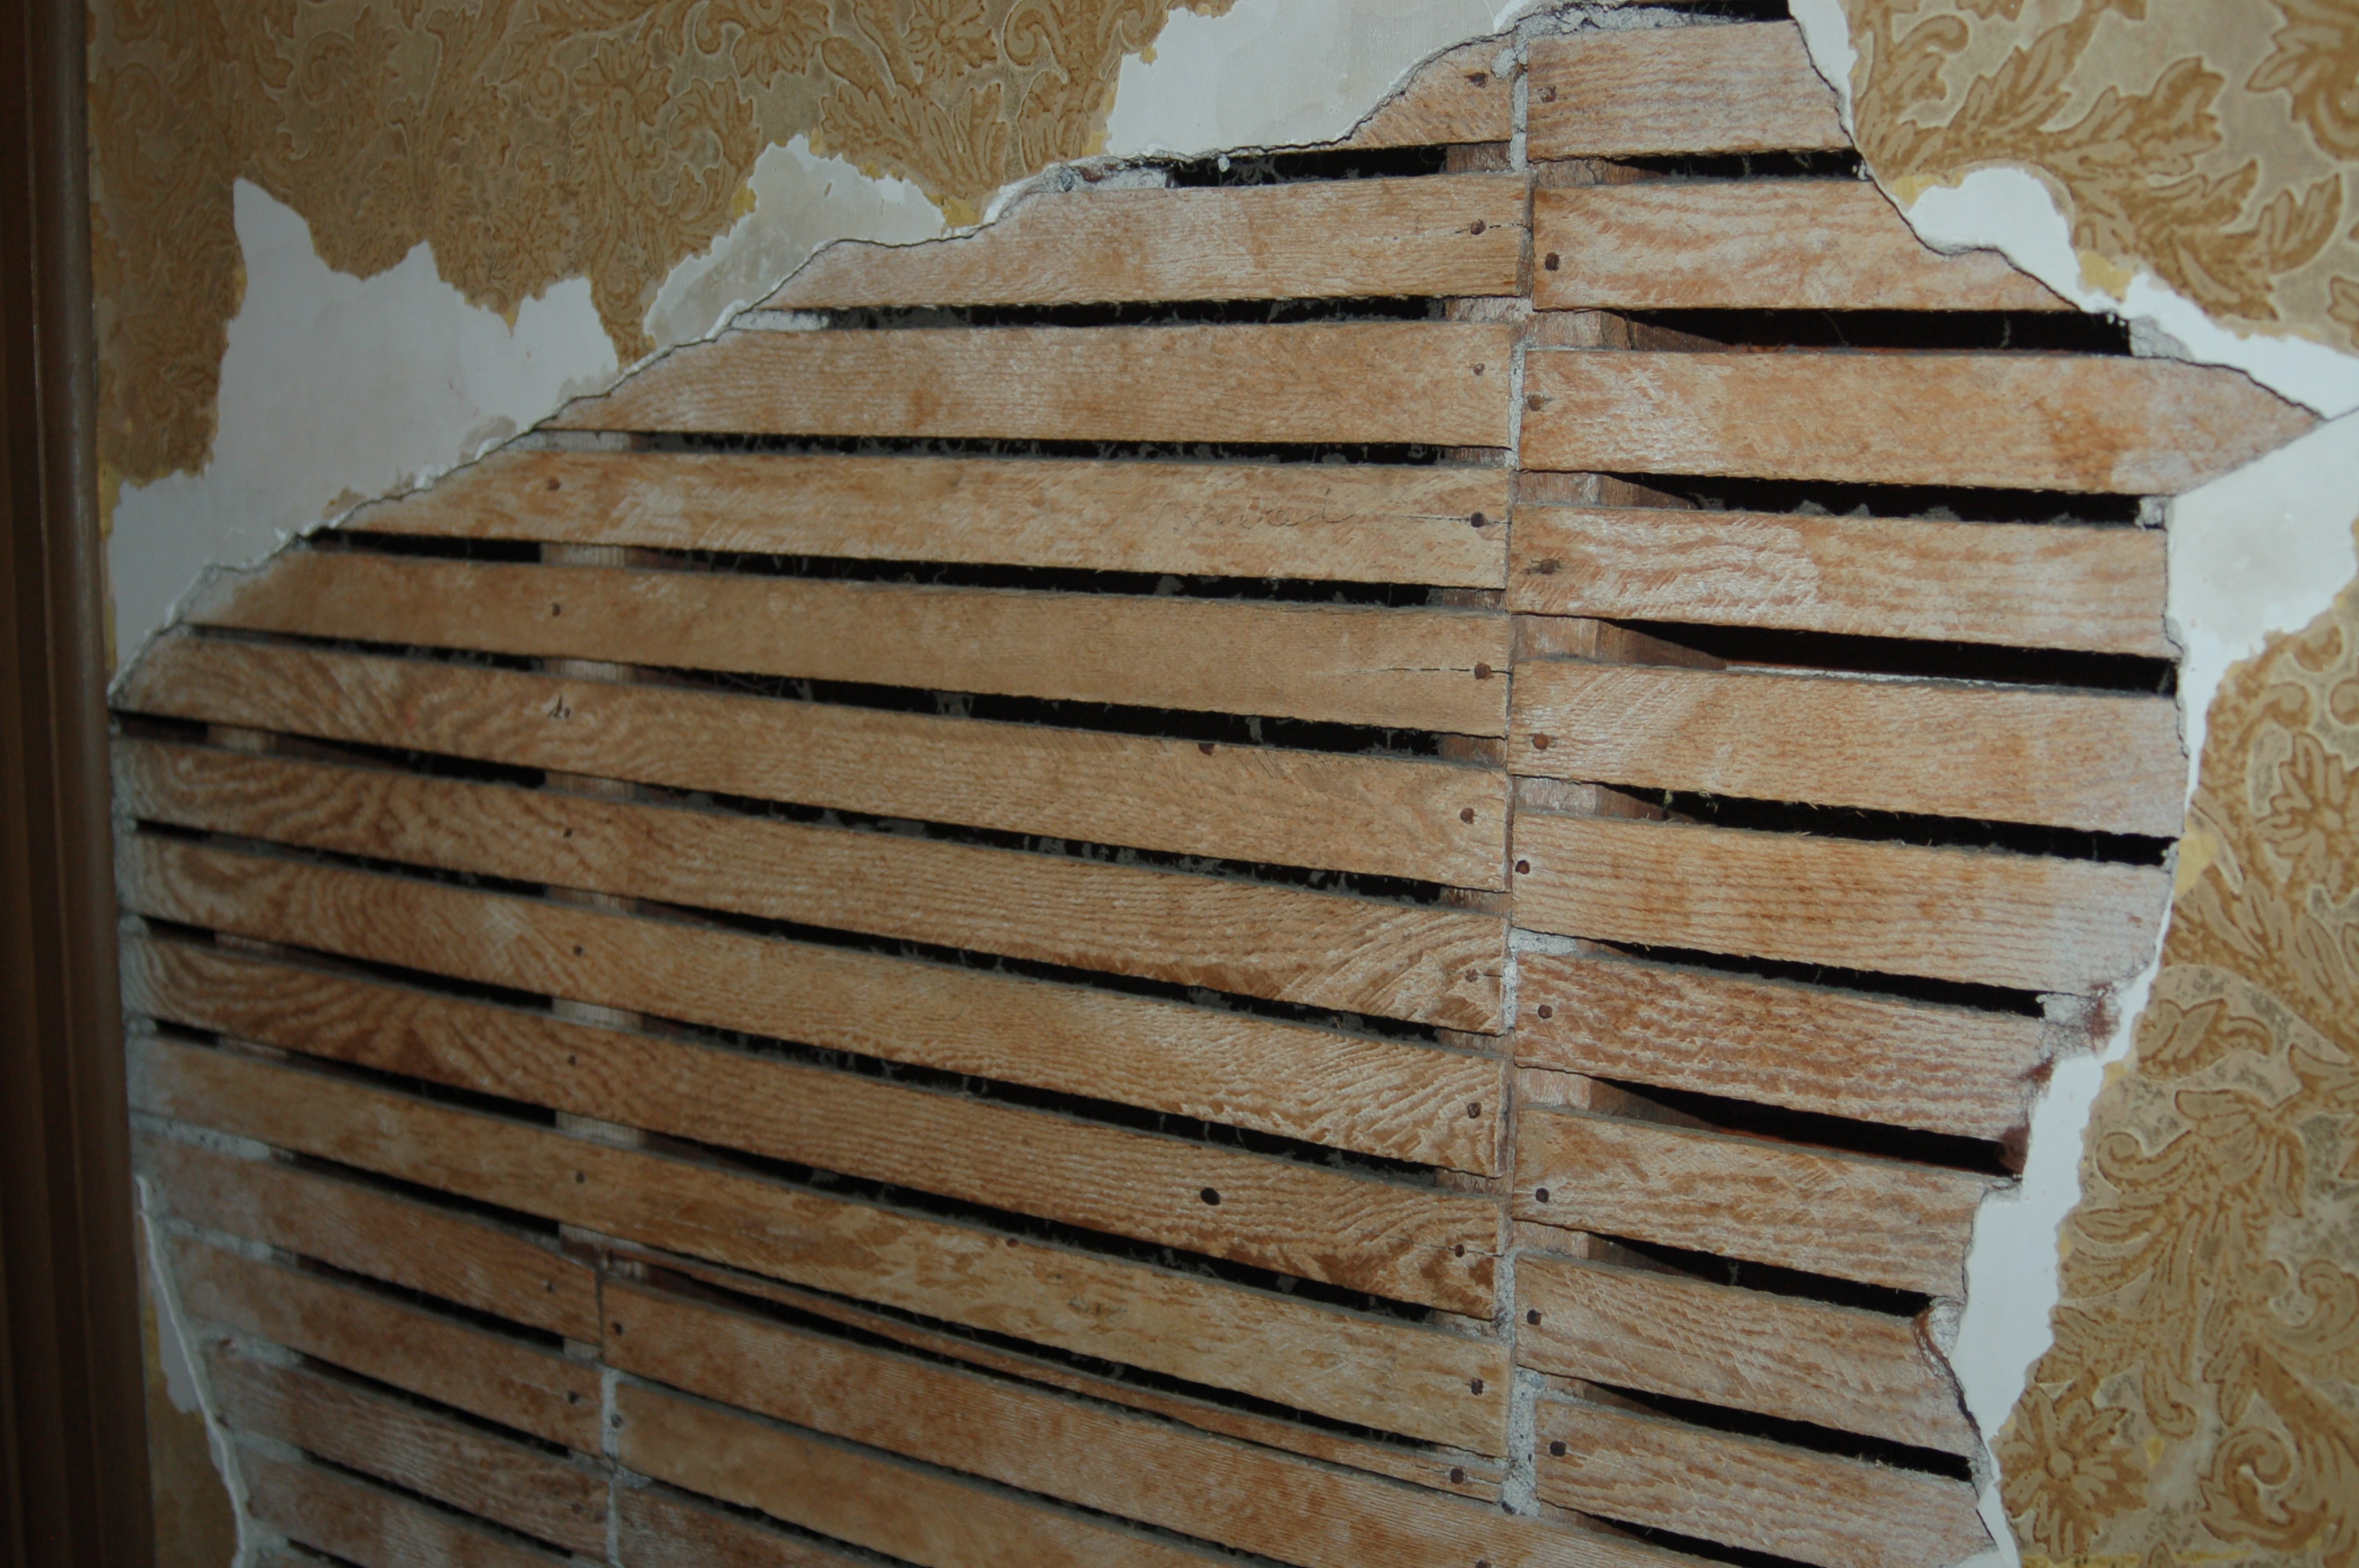
Now, let’s talk about the walls themselves. These walls are also very old – and they are not just your bog standard timber covered with the regular plasterboard/sheetrock stuff you pick up at any old home improvement store and then plastered over. No, babe – these are lath and plaster walls. Basically, it’s a bunch of strips of thin timber attached horizontally to the timber wall frame and then covered by hand in plaster to form the surface of the wall. Labor intensive and now, because of the age, also fairly fragile. See the photo below for an exposed lath and plaster wall to give you an idea how these are built.
So with that in mind, we couldn’t treat them just like we would any other wall in a typical property. The wallpaper had to be (gently) removed, and as you can’t work directly on lath and plaster, they had to be relined. And THEN they could be worked with!
Lastly, we had the trim to think about. The house has beautiful trim – really lovely period doors, architrave, skirting, and (wonder of all wonders!) working shutters! These all needed a good clean, rub down, and painting.
Given the sensitive nature of the project, that neither of us have ever worked with such old features and building elements, and that we are both working full time, we decided to hire someone to help us get this work done and so we could watch someone work through such a space once before we tried our own hand at it. Our lovely neighbour recommended a local hero called David who had worked on a similar property in the neighbourhood, and work commenced around Thanksgiving.
Now, without further ado, let me take you through the project!
Step 1 was, as you may have guessed, stripping all that wallpaper. It took a few days and generated about 3 full bin bags worth of rubbish. I won’t bother showing you pictures of that process, but here is what we found underneath:
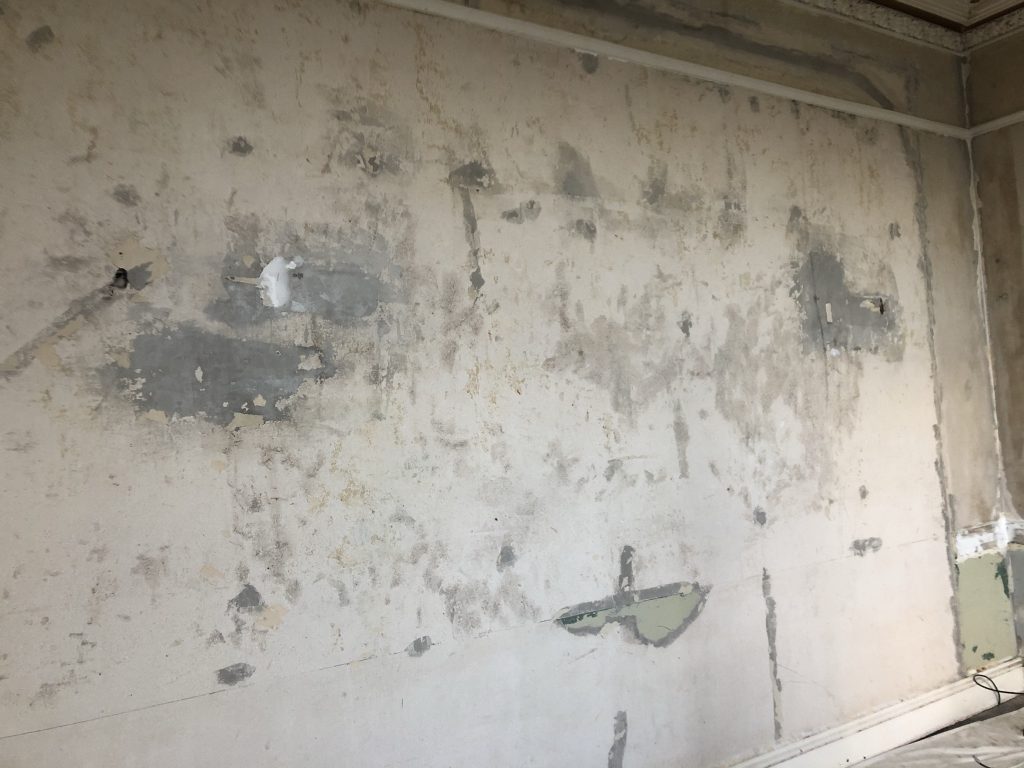
A few things became clear at this point.
First, we were already quite sure that the cornicing is original (therefore dating to 1830). What we didn’t know is that, at some point, someone had knocked through into the adjacent dining room and created an archway. Then, at some point later, they filled it back in and made them back into two separate rooms. This is evidenced by the newer plasterwork and the clearly visible arch extending beyond the picture rail. It is also supported by the presence of a different profile of picture rail on the internal wall – it is not the same as that used the rest of the way around the room. This makes sense, as it would have had to be removed to make the archway, and was later reinstated with something “close-ish”.
Second, the dado rail had, at some point, been cut away from the wall. Our original hypothesis was that this was to make room for furniture to sit flush against the wall, but upon the first discovery, we believe it was destroyed when the archway was made.
In any event, until we took the wallpaper off, we weren’t sure if the dado rail was original or a later addition. Early in the project, we had to make a call about whether to take it off entirely, try to reinstate the missing parts, or live with it in bits. Given that so much of it was already missing, we decided to remove the few remaining bits with the potential to reinstate in future if desired.
Third, the window by the fireplace is NOT original! It never really twigged for me that it was missing shutters, paneling, and architrave, as it had previously been covered up with the window treatments. Once those were down, I had blithely assumed that it was a legacy quirk of the house. However, underneath the paper, it is quite clear to see that it is much newer plasterwork surrounding the window, suggesting it was built in at a later date. Our surprise find was confirmed by looking at a very old photo of the house we found online that shows the east side of the house – sans window!
Riding high on these discoveries, there was still more prep work to do… For some reason, this room had a zillion telephone wires and boxes in it – so those were all removed. Who has landlines anymore anyway? Also, the older plaster where the archway was filled in was a bit delicate, so it was given a very gentle mist coat to try to stabilise it a bit. And, as you would expect, there was quite a lot of filling to do.
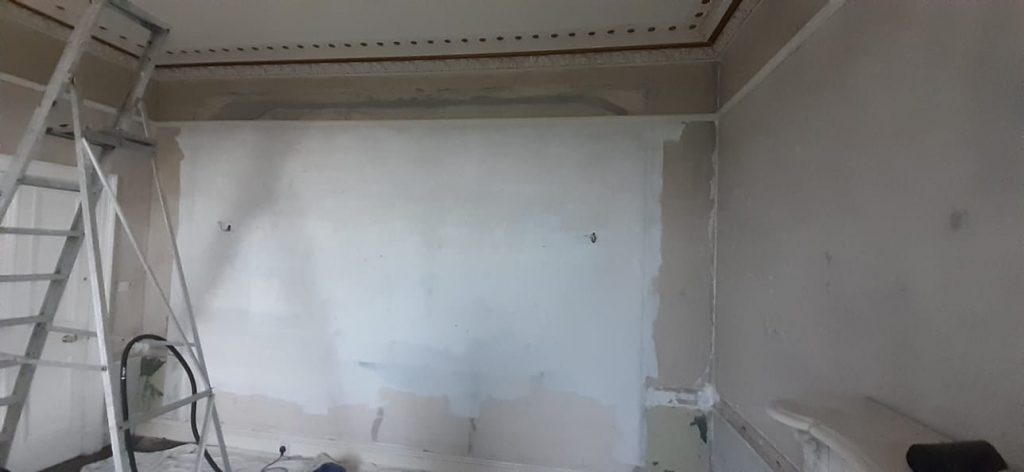
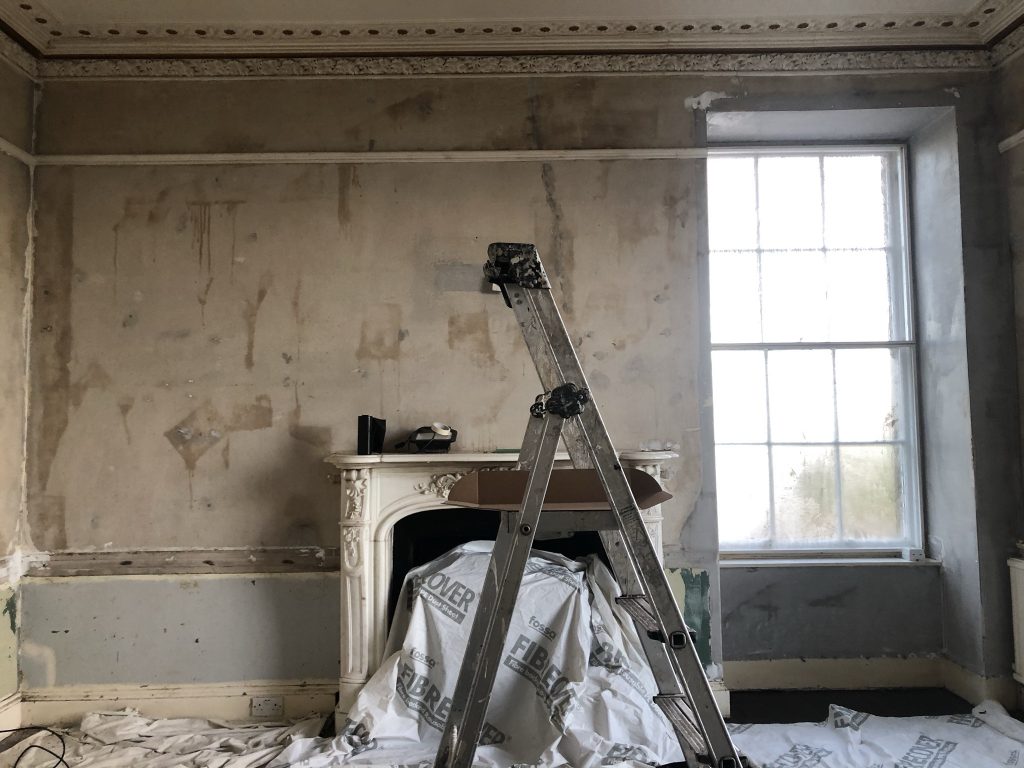
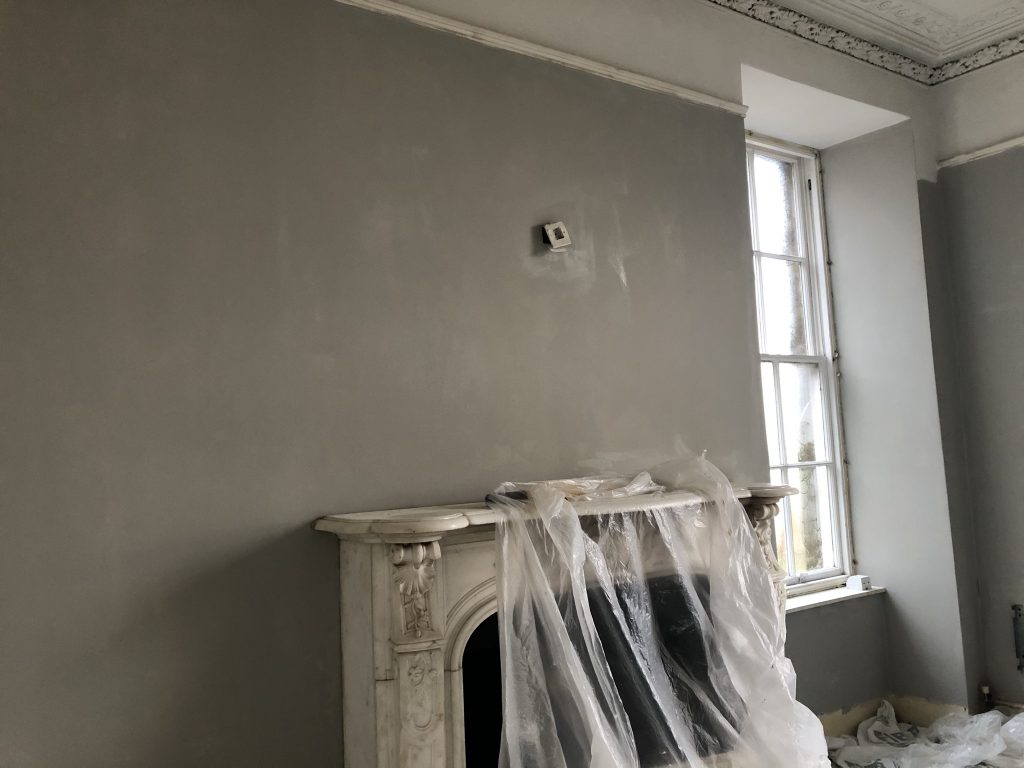
Following that prep, the walls were all relined and given a coat of white to prep the surface for the coloured paint we had chosen.
At this point, it was clear that the wall between the dining room and study was a bit “wavy davy” – so it received a coat of skim to try to even out the worst of it. But, old houses have old walls and these are very difficult to get perfect, so we decided to embrace the character of it!
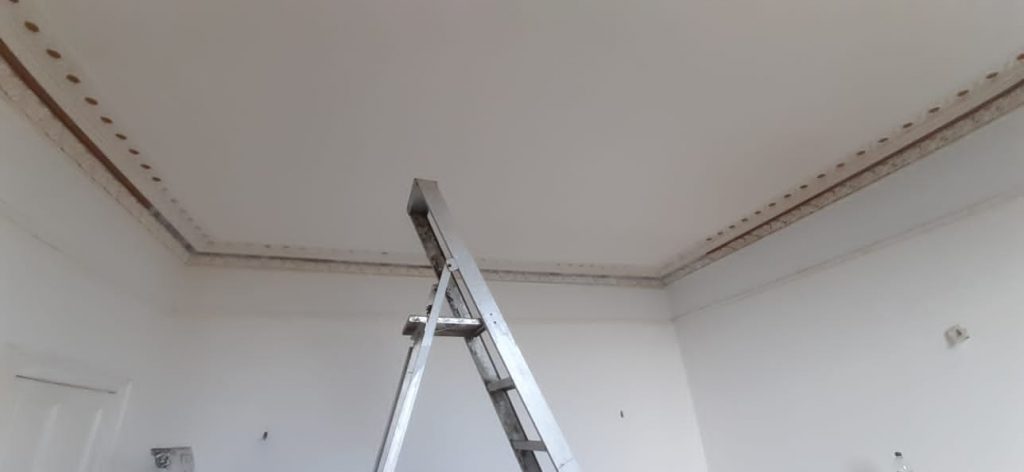
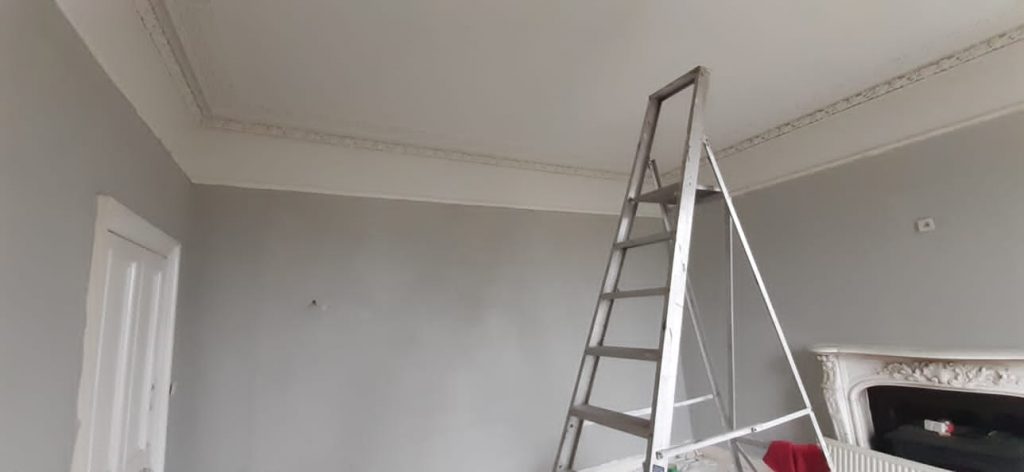
At this point, the ceiling, cornicing, and field above the picture rail received their initial coat of paint. The ceiling and the picture rail field were done with a roller but, as previously noted, the cornicing had to be sprayed to preserve the detail.
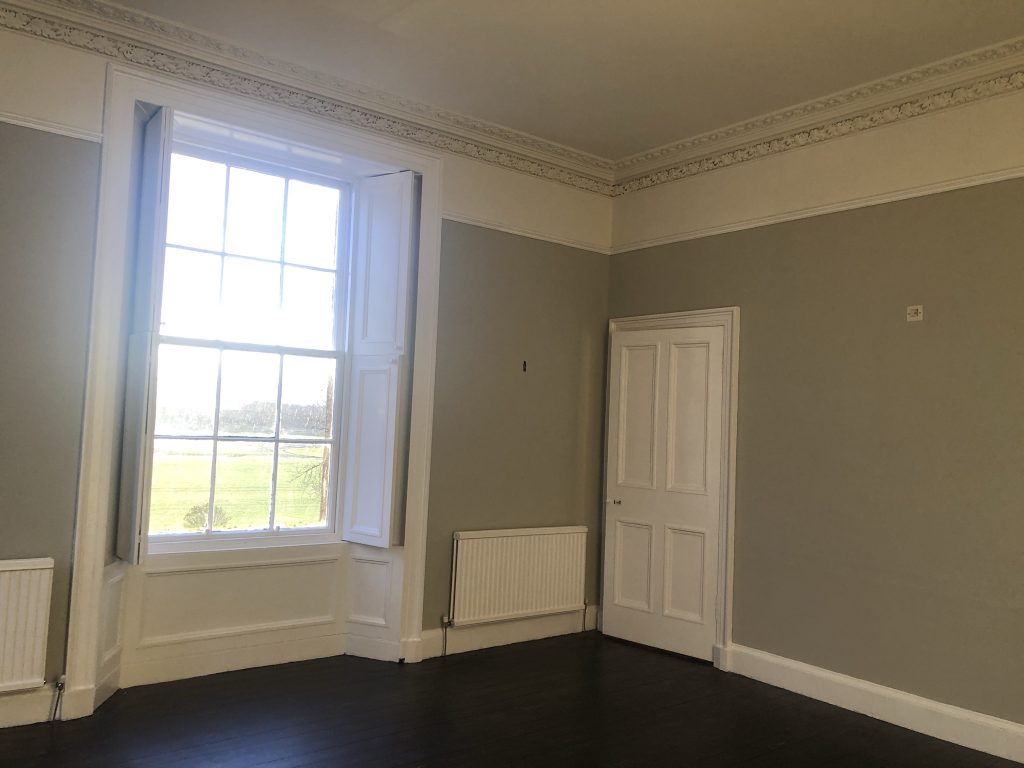
The colour we chose was Farrow & Ball Strong White, having been advised that an “off” white was a less abrasive choice for a period home. Incidentally, we were also advised to carry this ceiling colour throughout the property as we work out way through to unify the design.
While the skim dried, which took an absolute age in a big old drafty house like this one, the other walls received their initial coat of colour. We chose Farrow & Ball Pavilion Grey – while lighter than I had originally planned when thinking about this room, we ended up going with a lighter shade to complement the dark wood floors.

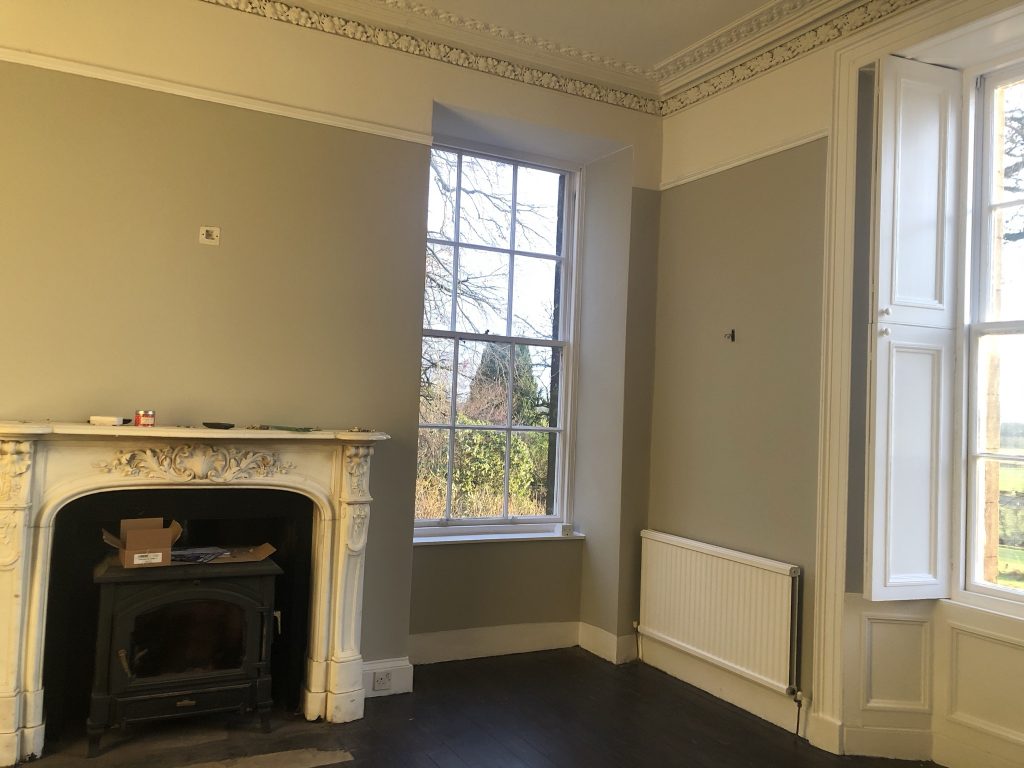
And if you’re wondering, at this point, why we didn’t extend the colour above the picture rail, that is by design! These ceilings are quite high – somewhere in the region of 12-13 feet – so we extended the ceiling colour to the picture rail in an effort to try to make the room feel cosier and less cavernous.
Once the skim dried, that wall was also painted:

And then, everything received a second coat and the trim was painted (all woodwork done in Johnstone’s eggshell pure brilliant white):
Here is the finished result without the tools/ladder and all the radiators back on the wall (they were painted too 😊)
What a change from this:
Totally unrelated to the current project, but did you know that it is a sort of tradition for tradesmen to “sign” their work? I learned this on our last renovation, as I often overheard our trades discussing where they’d like to leave their mark. And lo and behold, what did we find when doing this work?

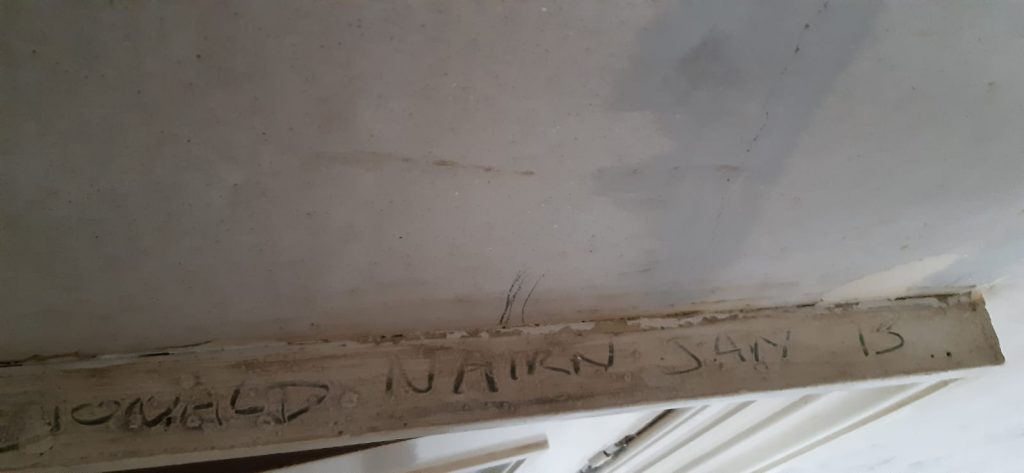
The first one is from before either of us were born, and the second was from 2013 – which I believe coincides with some redecorating the N- family did in preparation for Mr N-‘s 80th birthday party, by all accounts an absolutely amazing celebration!
So, there you have it – the walls, ceiling, and trim are REVEALED! I promise I’ll only drag this out into one more post to show you the room furnished and full decorated, but this was a lot to cover in one post and I’m now desperately in need of a little rest to recover 😂
Take care, everyone xx
I am impressed by the level of work just to smarten up the room so you can move forward with the decorating. The end result looks great and the plain coloured walls give a much more Georgian feel. Whether or not to keep the fragmentary dado rail is indicative of the very many decisions you have to make in a period home.
Excellent narrative – and the work you guys are getting done looks remarkable