It has taken me all summer to document this project, but a husband away on a business trip has given me the perfect opportunity to write the last installment in this series! Yay! 🎉
In the last two blog posts, I showed what the cottage looked like before the flood and after the flood – today, we finally get to have a peek at how the renovation turned out. So, without further ado, and minimal commentary (promise!), voila! 😻
The Kitchen:
The cottage previously used the second main room downstairs as a dining area, but we wanted to make that into a bedroom for better access to the bathroom. This meant we needed to make room for a small table in the kitchen – and to accomplish this, we had to cut back on the cabinets majorly (previously, they were on 3 walls in a U-shape). Since we had to rethink it anyway, it made sense to capitalise on the view of the walled garden, and we ended up deciding the move the sink to another wall, thereby allowing the kitchen table to look directly out at the flowers and trees. Dreamy sigh 😻🌷
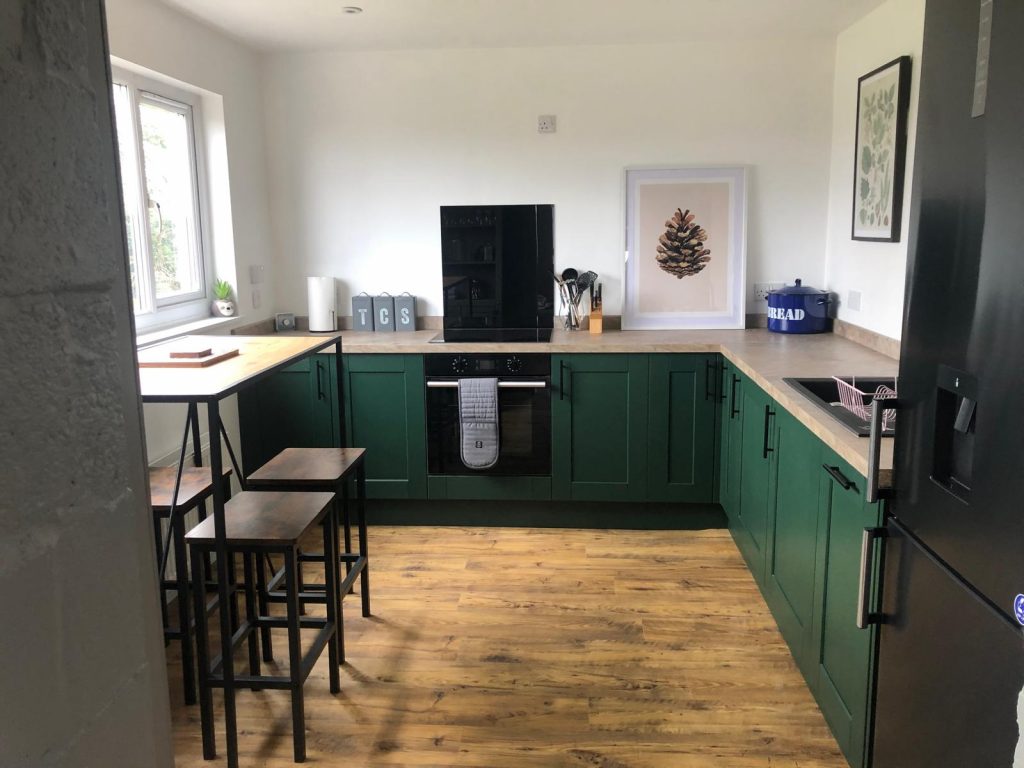
We also wanted to lean into the big green view and the ‘Garden Cottage’ name – so we chose the dark green cabinets to make it feel like the outside was coming in. 🍃
Long term, I still want to put some open shelves up, but what an improvement! It feels so much bigger and brighter.
Here’s the view looking out of the kitchen.
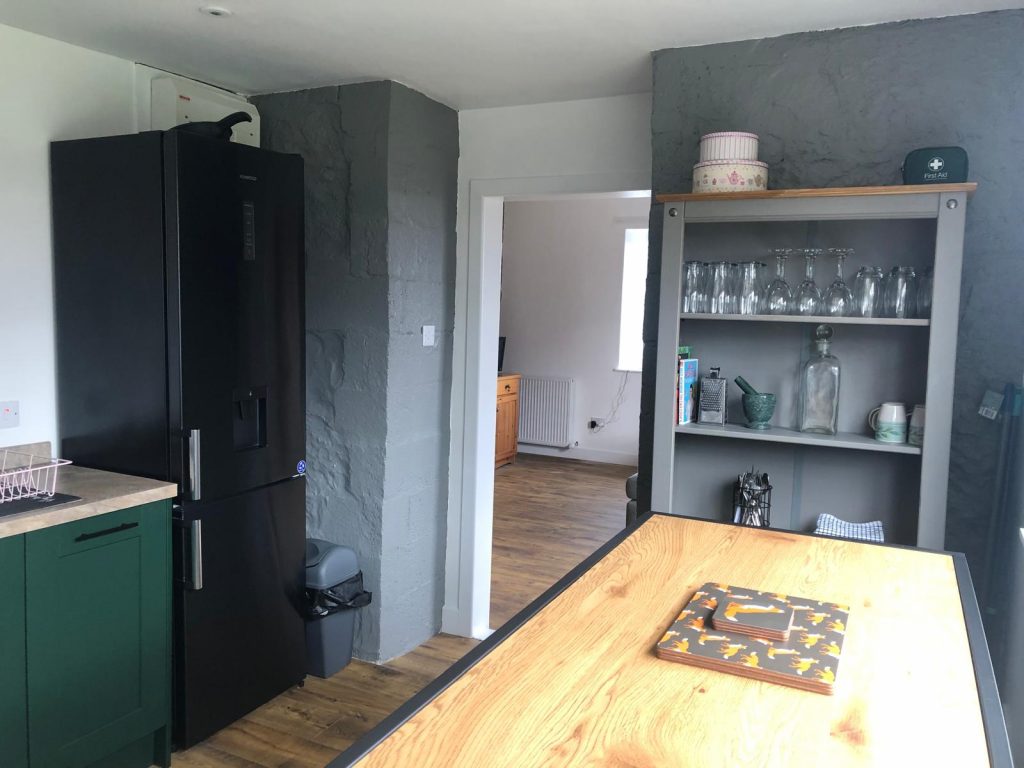
You may recall that these stone walls previously had some kind of beige render in great big dollops. Despite best efforts and significant effort chiseling and sanding that down, we couldn’t get entirely back to the original stone here – but we DID reclaim the proper original stone texture. Trust me when I say that the grey masonry paint is an improvement over what was left after the chiseling and sanding.
All in all, a tidy little kitchen!
The Lounge:
The first thing that you’ll probably notice is that, for two of the walls, we did NOT re-plaster them after removing the damaged plaster-board. We spent absolutely ages cleaning up these beautiful original stone walls – lots of clearing out old dusty mortar, scrubbing off old adhesive, etc. But, all in all, we think the effort was totally worth it.
Something you might NOT notice is that the ceiling is considerably higher. Since we had to rewire the electrics, we had the opportunity to inspect the ceilings and we noticed that the lounge ceiling was actually a suspended ceiling – who knows why! Anyway, we reverted back to full height and it makes the room feel so airy and bright.

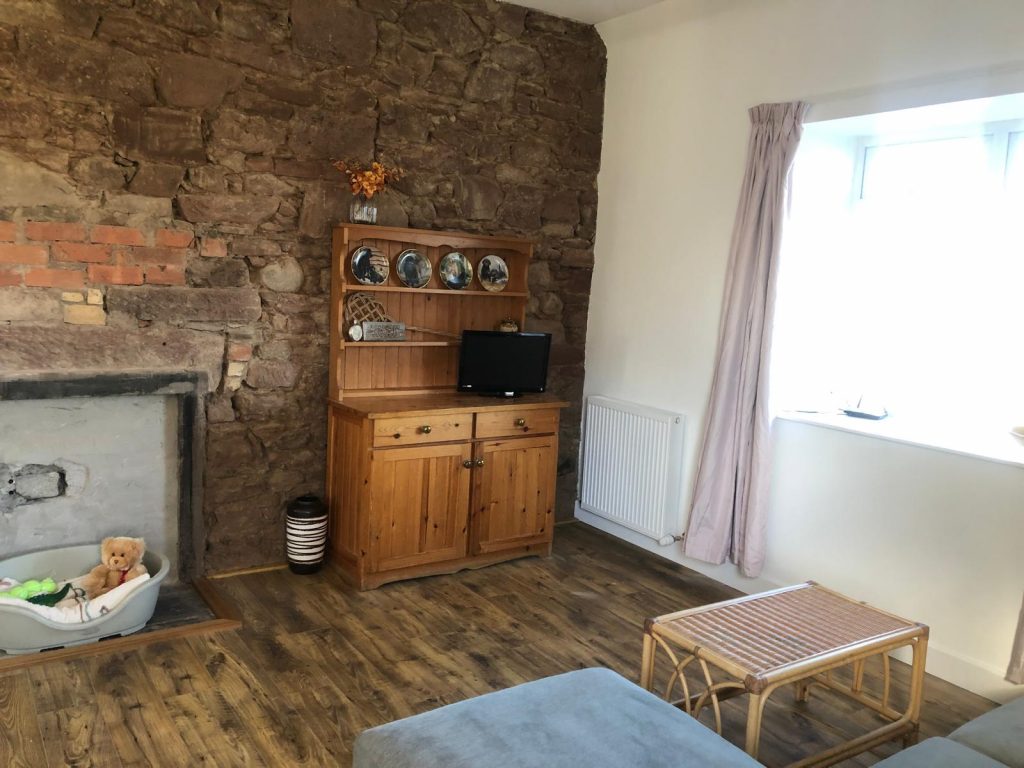
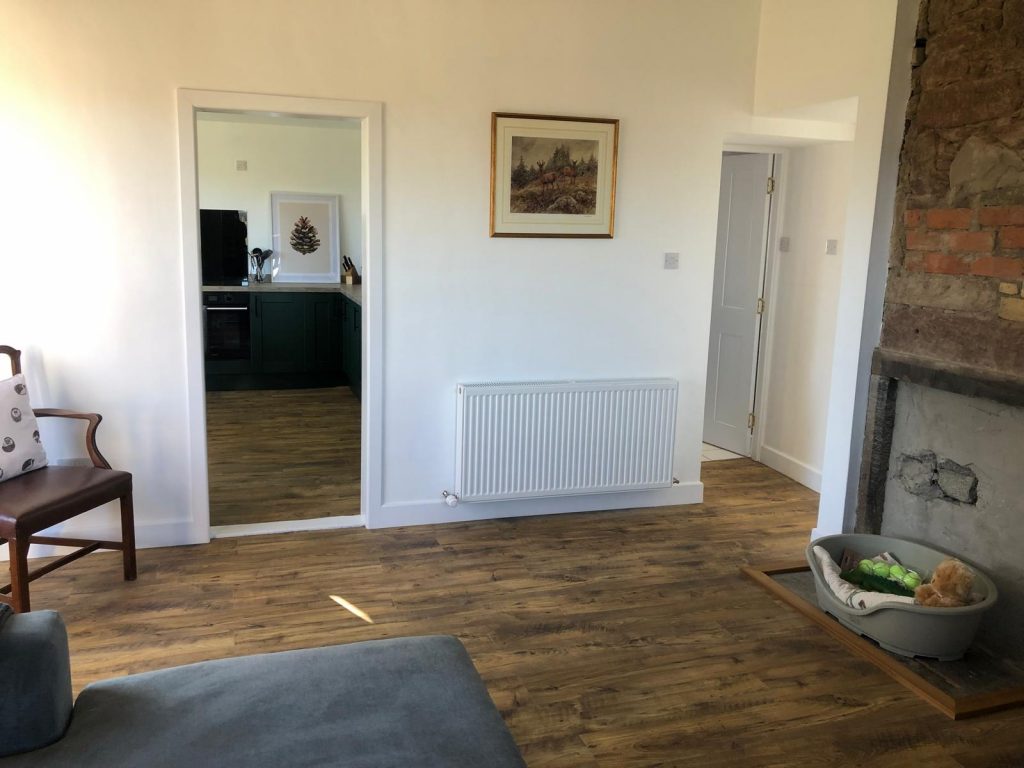
We still have some work to do – we want to seal the stone walls to stop dust falling, and we need to get the old fireplace tidied up a bit. I also want to add some more flair to the space – though I do really enjoy the light and clean feel it has to it just now, I think it wants a bit of OOMPH.
(As a note, the furniture was a bit of a stop gap – we hosted a Ukrainian family from March 2023-February 2024, and these were the bits we cobbled together for them – so we will be refurnishing in advance of the holiday let opening up. 😬)
The Bathroom
The bathroom is still a bit of a WIP, but I think it is a huge improvement over what was there and it has a bit of a story to tell.
The bathroom suite is actually repurposed from the main house. When we redid the master en-suite in the main house, it had a really cool late 70s aqua bathroom suite and I wanted to keep it, as it was in really great condition. However, I didn’t want to put it in the holiday let for fear it would get damaged.
What’s a girl to do?
Well, we ended up removing the suite from the family bathroom in the wing to make room for it – and THIS is where the family bathroom suite from the wing ended up! Honestly, it is the perfect vibe for a cottage bathroom – and they don’t make quality like this anymore, so it will last forever. More importantly, the aqua suite is safely settled for future use in the wing! ♥
Now, I would forgive you if you said your eye was drawn to the massive towel radiator. You might not be surprised to learn that wasn’t originally intended for this bathroom. It was actually meant to go in the master en-suite in the main house, but when it arrived, the brass tone wasn’t a good match for the other brass tones in the master en-suite. Rather than pay to ship this massive thing back whence it came, we decided to re-purpose it in the cottage. 😁
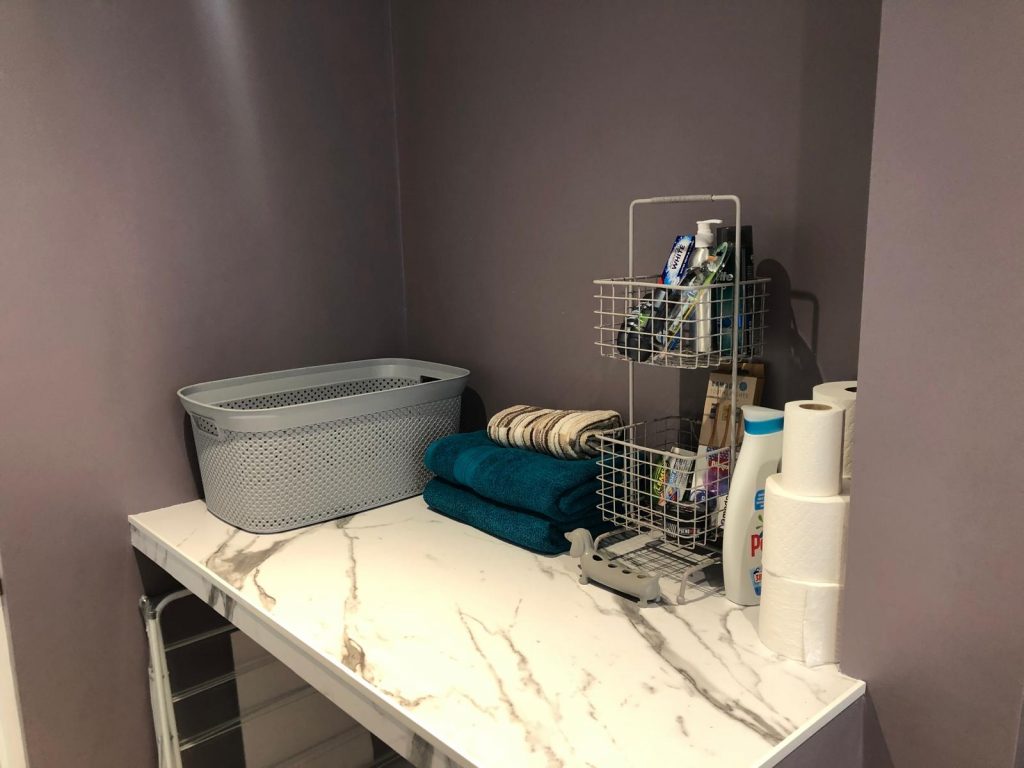
You might also notice that the bathroom was originally a fair bit smaller. That is because the doorway was originally where the little half wall was – and the little half wall originally formed part of a small hallway closet. We moved the doorway out further and took the wall down to half height so we could make a laundry space (there is a fitting for a washing machine in the cavity below the shelf). In such a small cottage, this seemed like a super logical use of the room – and it also allowed us to use up the scraps from the shower surround to make the little shelf!
One thing you can’t see in the pictures is the floor – but I am also quite proud of this little touch. We did the tiling ourselves, and while it isn’t perfect, it’s a solid B- job (Sorry, Chris! 😅). HOWEVER, it ALSO was a ‘use up’ project – we had a few square meters of a Laura Ashley tile I had bought in excess for a project in our last house, and it really matched the aesthetic, so we finally got that used up and out of the barn! As they say, waste not, want not!
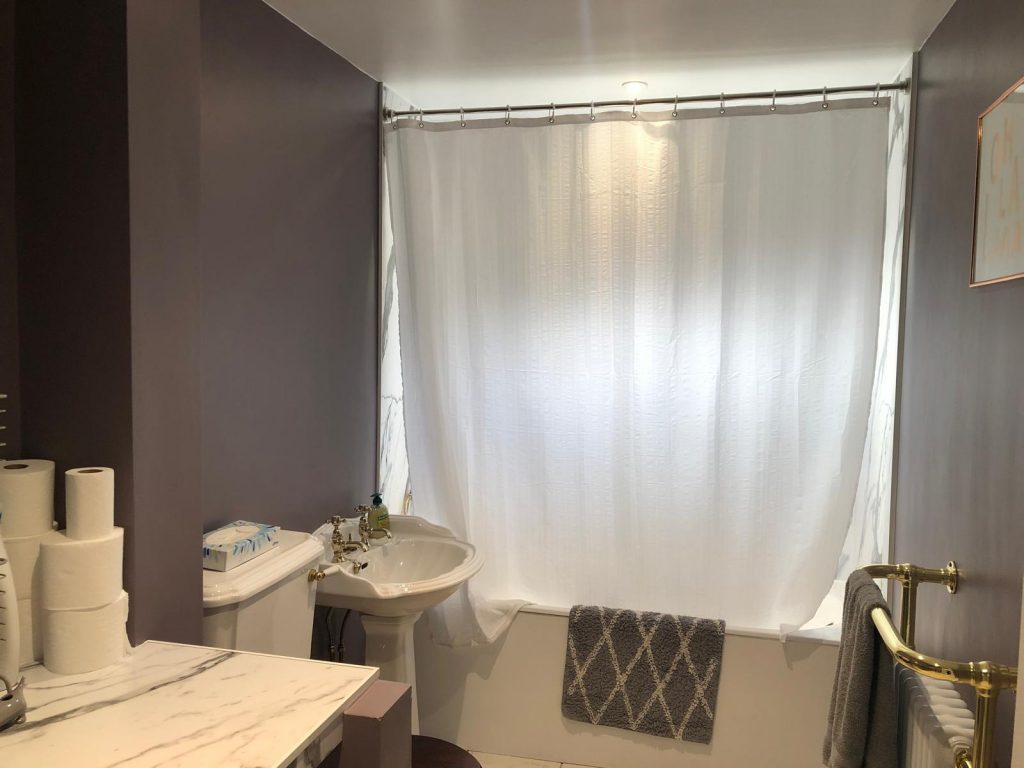
I’m not crazy about the purple paint – I had this sample pot in the cupboard and had to make a quick choice, but we’ll be redoing it before long. I’m thinking an olive-y green. 💚
But, all in all, it’s a decent bathroom and a vast improvement over what was there before.
The Bedroom
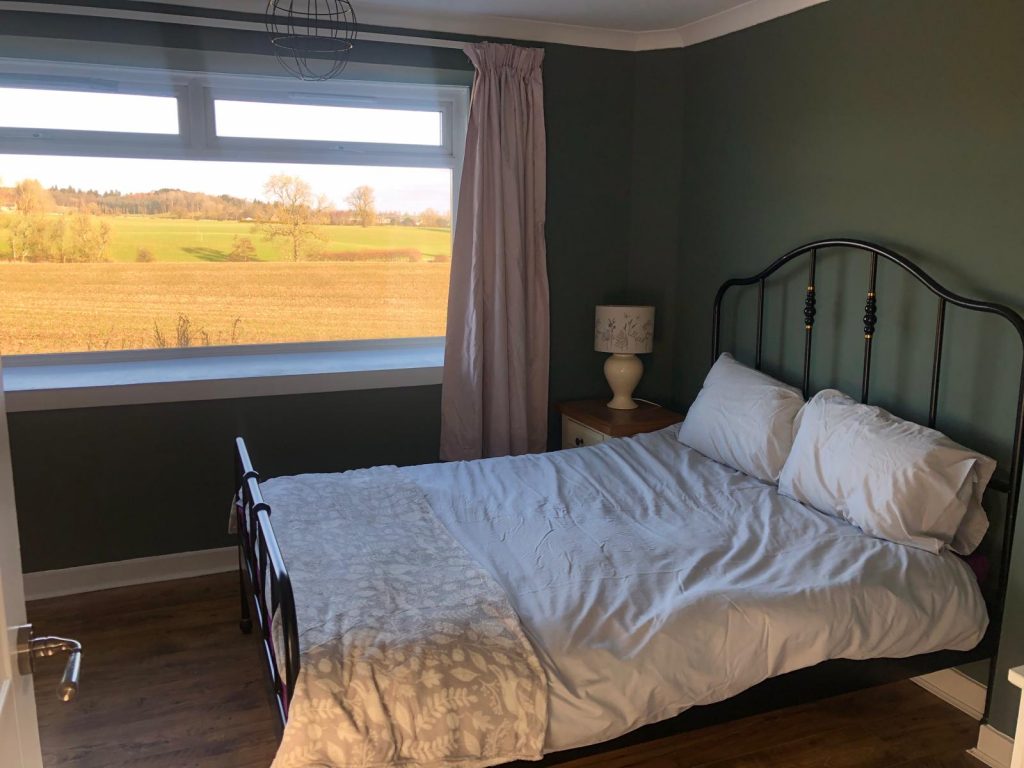
Last but not least: the new bedroom downstairs. As I wrote above, this had previously been used as a dining room, and the upstairs room was used for sleeping. But, there’s nothing worse than a middle-of-the-night wee paired with stairs, so we decided to switch things up and make this the bedroom. The upstairs room will now be turned into a library/office space (maybe I’ll post about this when it’s all done!).
Thankfully, this room was really straightforward. There wasn’t much damp damage so it was just a case of new flooring and a good lick of paint. Why get in the way of such a gorgeous view?
Phew.
So, that’s it. This was a massive project – so much more than I can write about: rewiring, replastering, replumbing, moving walls, shoring up windows, replacing glass panes, fitting a new boiler and all new radiators, installing new flooring, fitting new carpets, fitting a new kitchen, fitting a new bathroom, changing doors and door furniture, changing light switch and outlet covers, and a million other tiny things I’ve forgotten about.
But, we are so chuffed with the result – we think it really does the little cottage justice and we can’t wait to welcome people on their holidays. Hopefully we will get our short-term let license soon and can get rolling!
I have to give enormous thanks to all of our fabulous tradespeople – we couldn’t have done it without you lot! Thank you to Jon P., Eoin, David, Stuart W., Stewart M., and Will (and all of their respective crews). This job, start to finish, took about 14 months to do and without the team’s cooperation and guidance, we would never have pulled off anything half as good in twice as long. Thank you, thank you, thank you! 🙌
Hopefully you like it – do let us know what you think!
Great job and congrats on using up stuff! I have a bunch of that and need a project!
The cottage looks amazing! What a great job! Thanks for sharing!
The cottage is lovely!
I think you have done a fabulous job and it looks really stylish and modern without losing the cottageness of it. Well done.