With Christmas and the start of the new year at work, time has been a little short to write anything in the blog – but rest assured: behind the scenes, Chris and I have been very busy with the house! Over the past few months, we have completed a number of small to mid-size projects, and now that winter is preventing much progress outside, I have time to start writing about them now (yay!).
So, where do you start in a house as big as Bardmony and with so very much to do while having limited time? Well, the day we moved in, we decided our first real project would be the study. While it was absolutely in keeping with the style of the decade in which it was last decorated (the 1970s), it is one of our main living spaces and we wanted to create a cosy space for unwinding at the end of a busy day, away from the chaos and pressure a full-scale renovation inevitably brings.
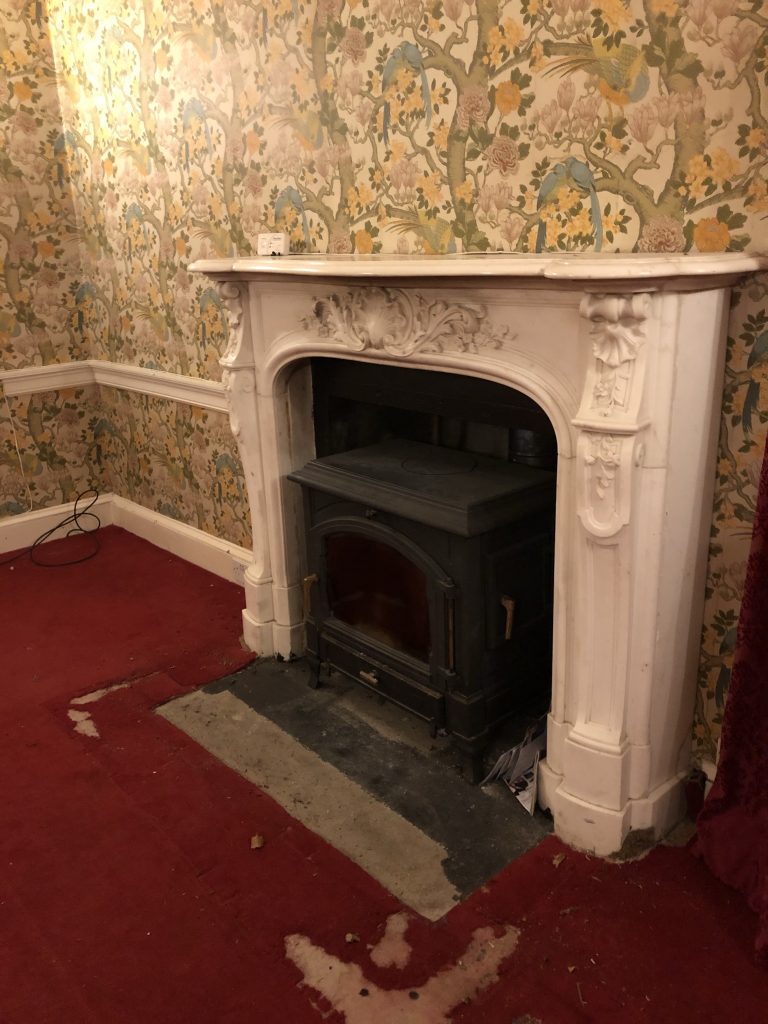
The study is located in the most southeasterly corner of the house and is blessed with generous proportions, great natural light, and an absolutely beautiful statuary white marble fireplace (will tell you all about that in another entry). When this house was last occupied by the N- family, it was the centre of Mr N-‘s day-to-day world, and special attention was definitely given to this space when the N- family moved in.
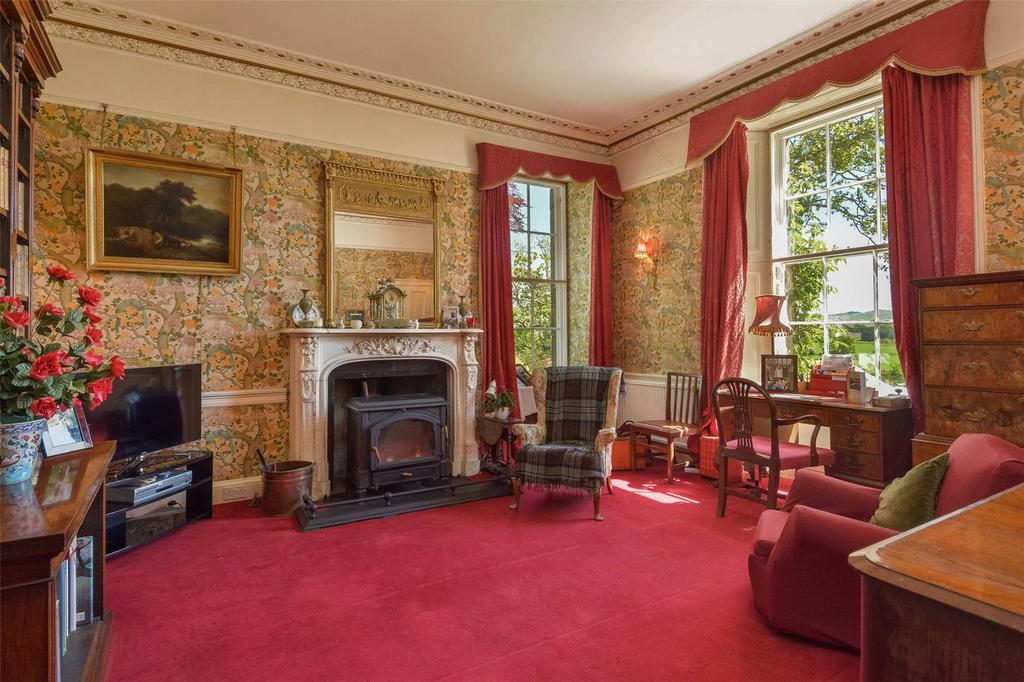
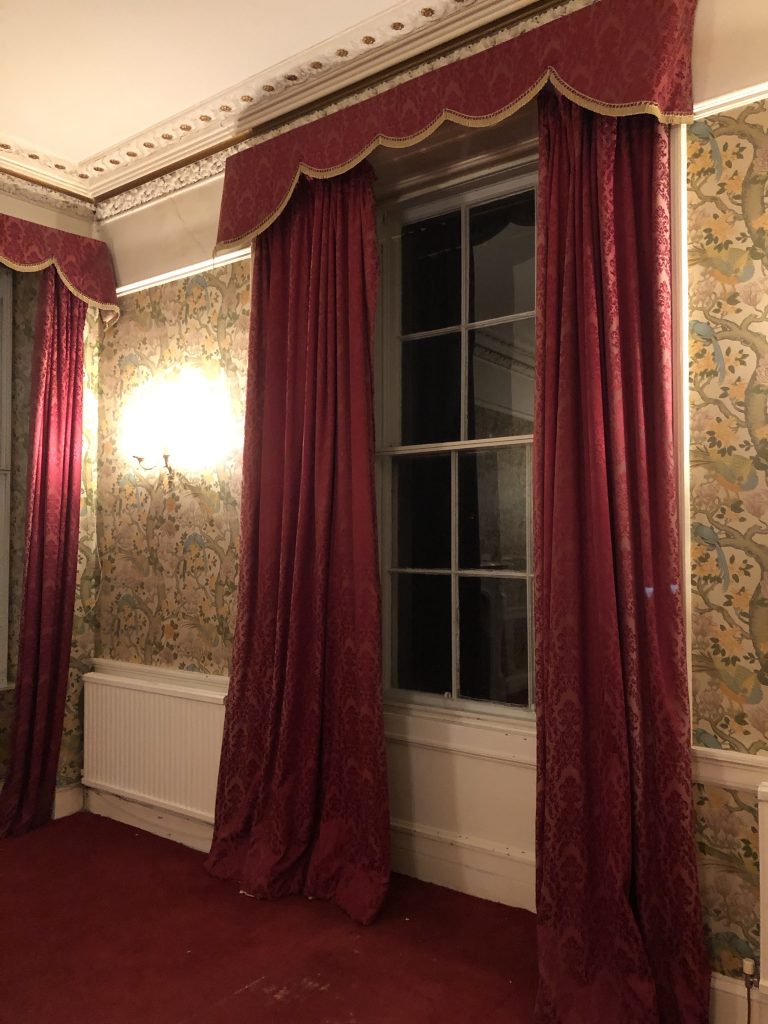
We were told that the interior decor of the Georgian part of the house was primarily designed by Nina Campbell – if you’re an interior design fan, you may well know that name, as she is still a Pretty Big Deal in the design world and still works in London. I imagine when she did this house, she would have been quite young and just starting out, but if you look at her current portfolio, you can still see whispers of Bardmony’s style throughout (think bold patterns, wallpaper, colour, and gold accents). In any event, it would have probably have been quite the thing to get someone like her to design your house. After all, she’s done work for the Duke and Duchess of York, Rod Stewart, and Ringo Starr (at least, according to Wikipedia!).
The wallpaper you see in the photo is a Morris & Co pattern that I think was probably manufactured by Sanderson in the 70s (the original Morris & Co dissolved around WWII, but prior to that, was renowned for high quality wallpapers and fabrics in Victorian times; its pattern catalogue continues via Sanderson today). It features a pretty wild bird scheme (something that echoes throughout Bardmony; we’ve been told Mrs N- was extremely fond of birds). Unfortunately, it’s no longer in production, and it had been quite badly stained over the years with both water and smoke.
The carpet in the photo is a red Wilton velvet carpet and would have been classed (and still is classed) as a luxury carpet beyond the types of carpet you’d pick up at a big box carpet retailer. These are the types of carpet you’d see in National Trust properties, and we were told by a local carpet expert that stately homes generally avoid modern loop or pile carpets when they carpet a space, which makes sense – he gave us a few samples to try for another room and they looked super out of place in the house. Sadly, the carpet was fairly threadbare, as you’ll see in the later photos, having been the unfortunate target of some carpet moths and damaged by the cast iron fender of the fireplace through years of use.
Bearing in mind the condition of the space, Chris and I were sadly unable to retain any of the decorative elements in the room without compromising the overall comfort of the house. So, we were left with a decision on what to do with the space. This brings me to Part I of the project: the FLOORS!
I am a huge lover of wood floors, and having done some research into Georgian interior design, was totally sold on the idea of going back to wood floors in the study if at all possible.
Cautiously, we checked the corners of the room to see what was under the carpet – was it floor boards or was it something else lurking under there? The back of the house has some older linoleum type flooring over what appears to be a concrete floor, so we weren’t sure if it was like that or if it was wood, and if it was wood, in what state we’d find it. Chris had seen it from the wine cellar, but he couldn’t tell a whole lot about it from under, as it has some older style floor insulation on the underside.
Thankfully, we were in luck – it was WOOD! Yippppeeeeee! I could have my lovely wooden floor 😍 Somewhat disappointingly, they were not Georgian floorboards – we suspect they were 70s era, which ties in with a story the N- sisters told us about an early visiting tradesman to the property falling through rotted floorboards to the cellar below; most likely, these replaced the ones in that were in such disrepair when the N- family bought the property.
Now, if you know Chris and I personally, and have spoken to us about any of the other renovation work we’ve done, you’ll know we have refinished a wood floor by hand ourselves in the past. Let me tell you: once was enough. Sanding a floor is hard work, it’s messy, and it can be a make or break task for a relationship when you start applying stain 😂😳 All that to say, I outright refused to do it again. So, I called around and got some quotes; we ended up choosing Paul from Citrus Floorcare, who we instantly clicked with and who we thought had some good advice on the floor generally. Also, he works with Bona stains, of which I am a huuuuuuuge fan!
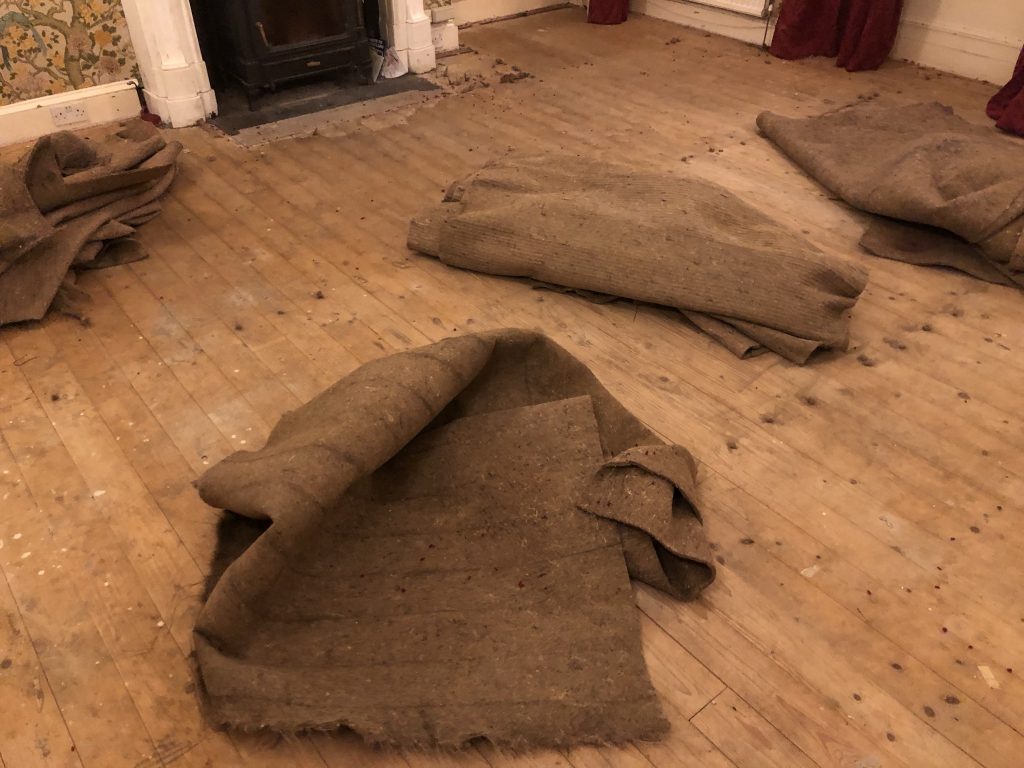
Our first job was emptying the room entirely for him to start work. We had already set up some basic furniture in the room, and that all needed to be pulled out. Additionally, we needed to remove the carpet and underlay for him.
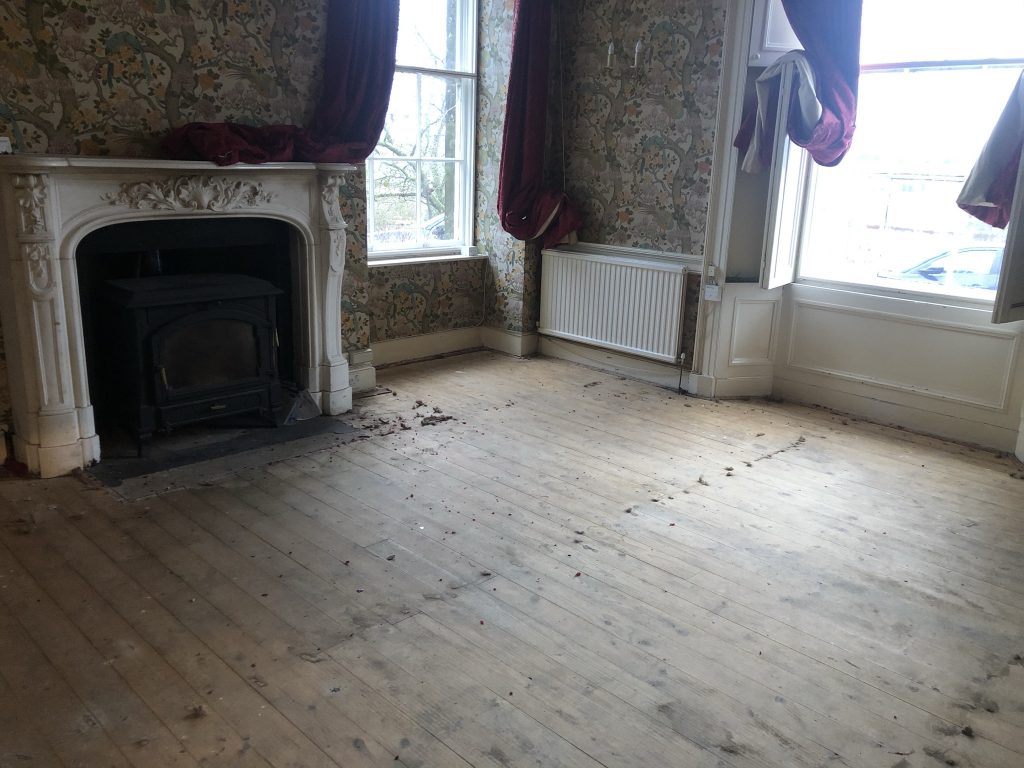
The empty room:
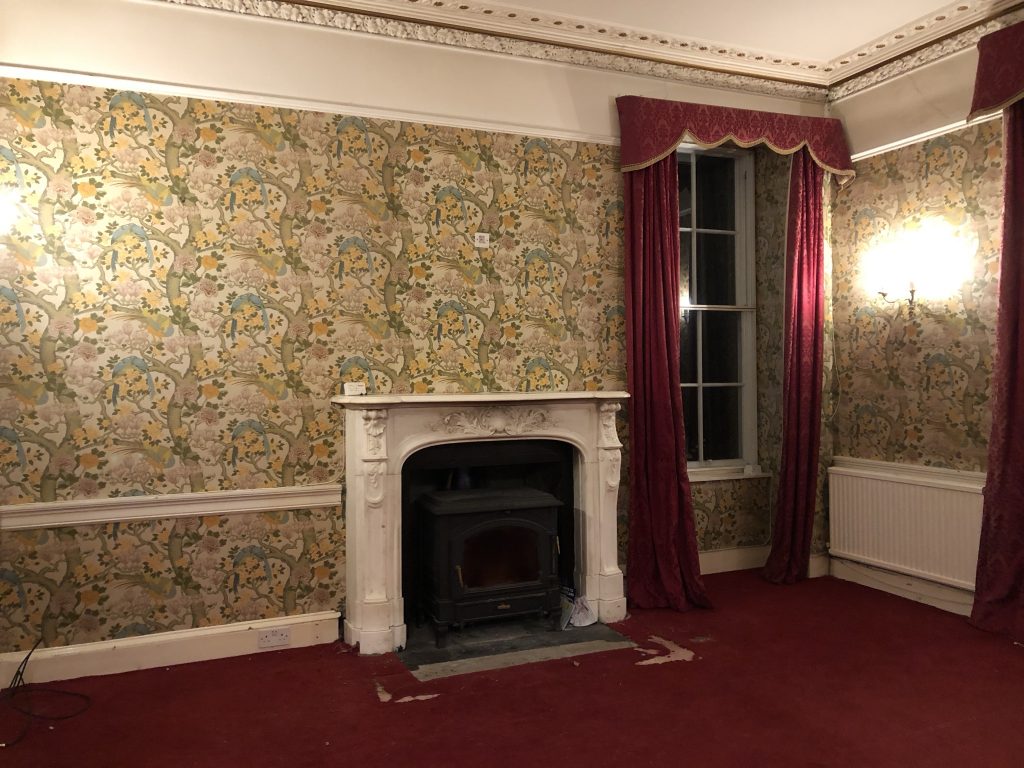
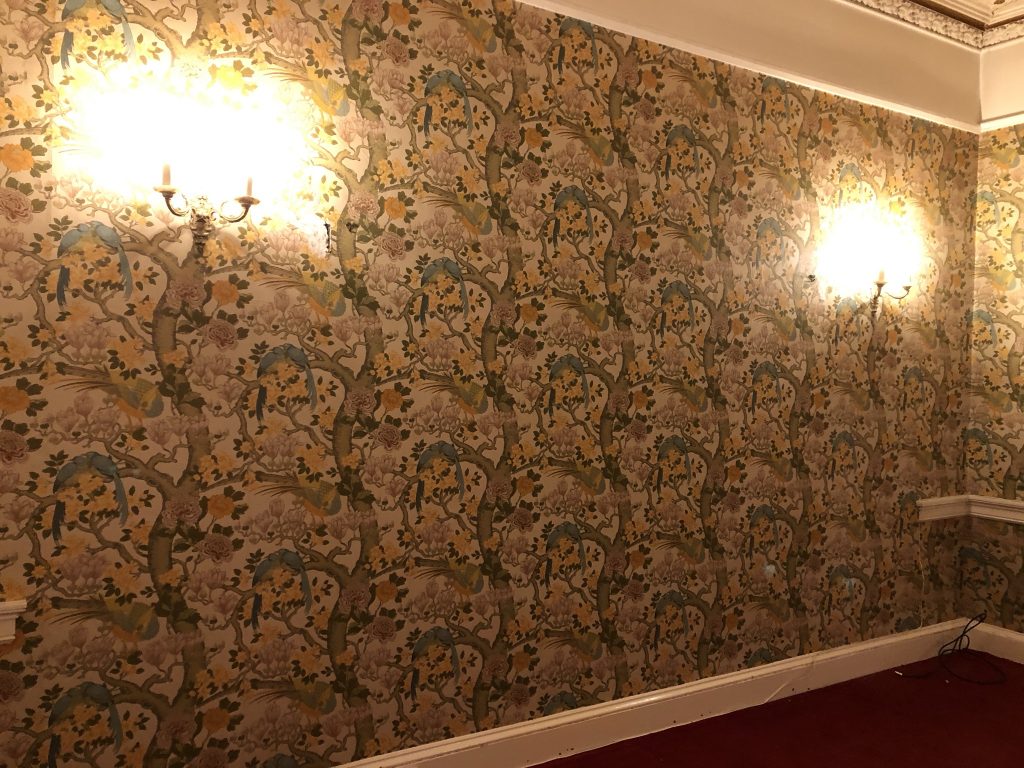
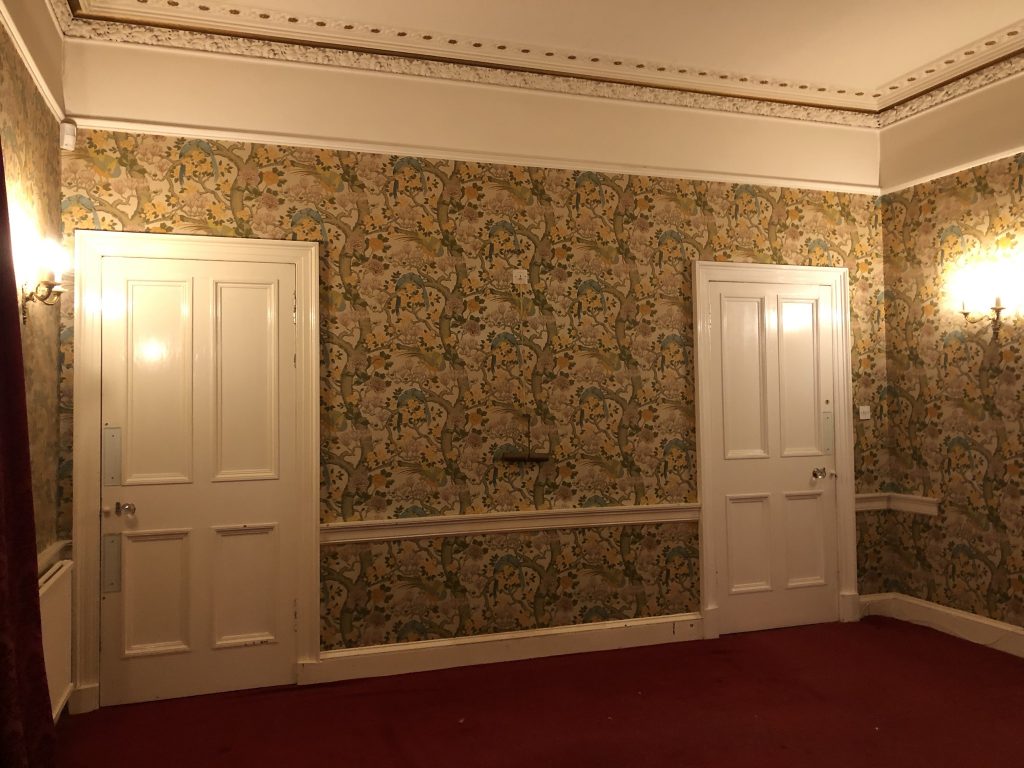
As you can see, the carpet certainly had seen better days, but isn’t that wallpaper pattern magnificent?
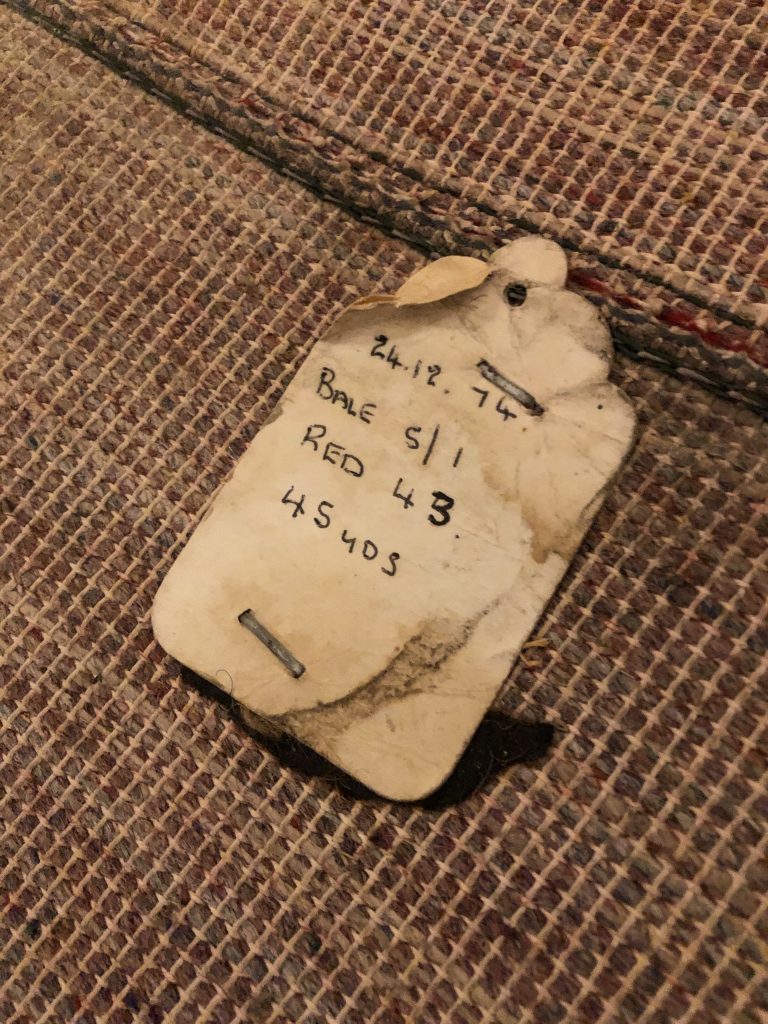
Then, we had to pull up the carpet. Amazingly, when we pulled up the carpet, we found a tag from when it was bought – this carpet was purchased on Christmas Eve 1974! How neat is that to be able to date it so precisely?!
The room changed amazingly quickly as we took out the carpet and underlay:
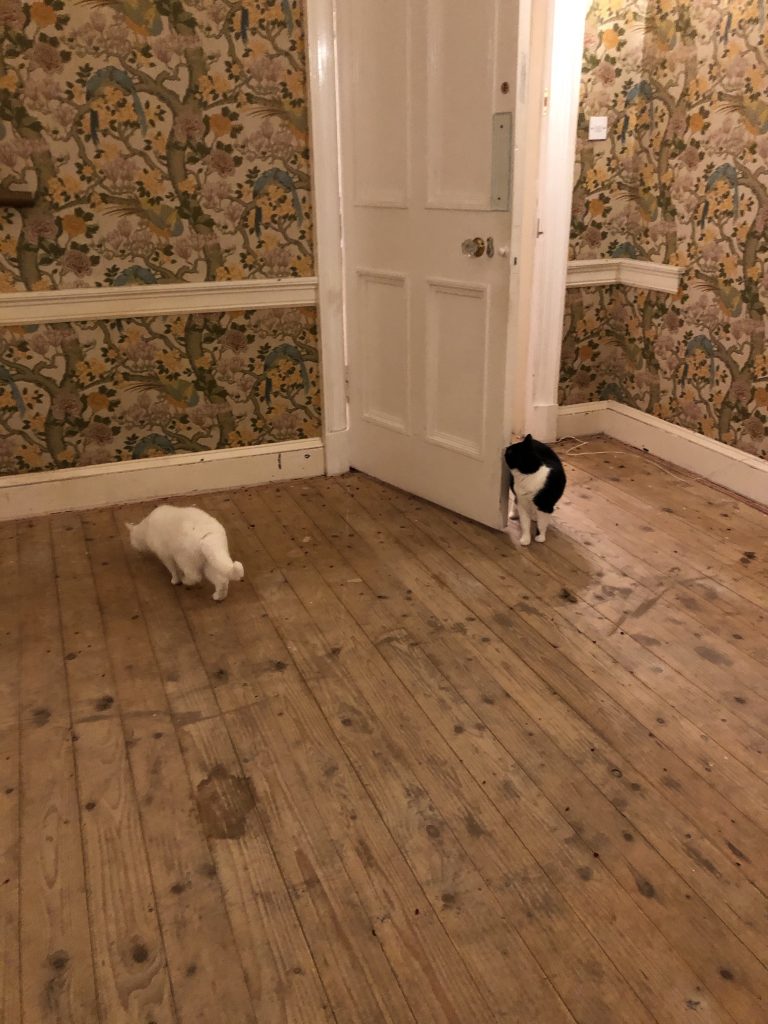
The girls were desperate to be a part of everything, snoopy little floofbutts that they are:
Daylight brought a whole new perspective to the room:
Then, the professionals took over. They started out scraping off old adhesive and pounding in the nails so they could start sanding. And then they sanded, and oh my goodness!
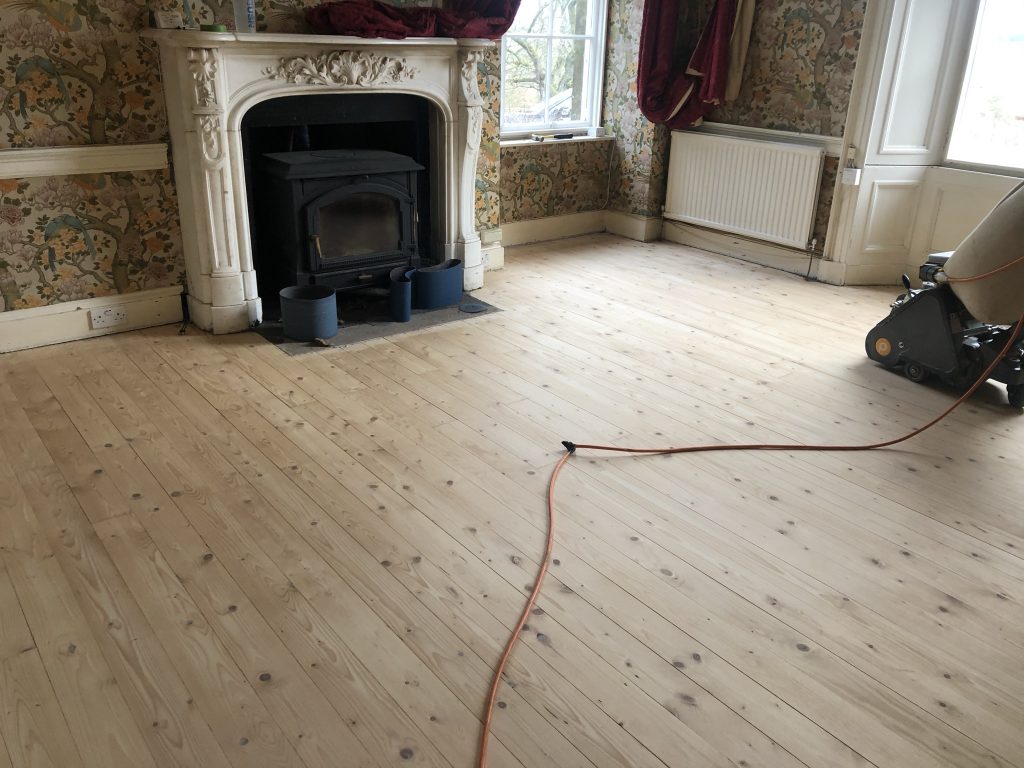
Their machine was so speedy and left literally zero dust in the house. Both Chris and I were working while they did this work, and neither of us were disturbed by the noise at all. If you’re weighing up the pros and cons of trying to do a wood floor yourself or paying someone to do it, as someone who has done both, for the love of God, please just pay the money and get it done. You won’t regret it.
Anyway, once that was done, they did the first coat of the Bona stain:
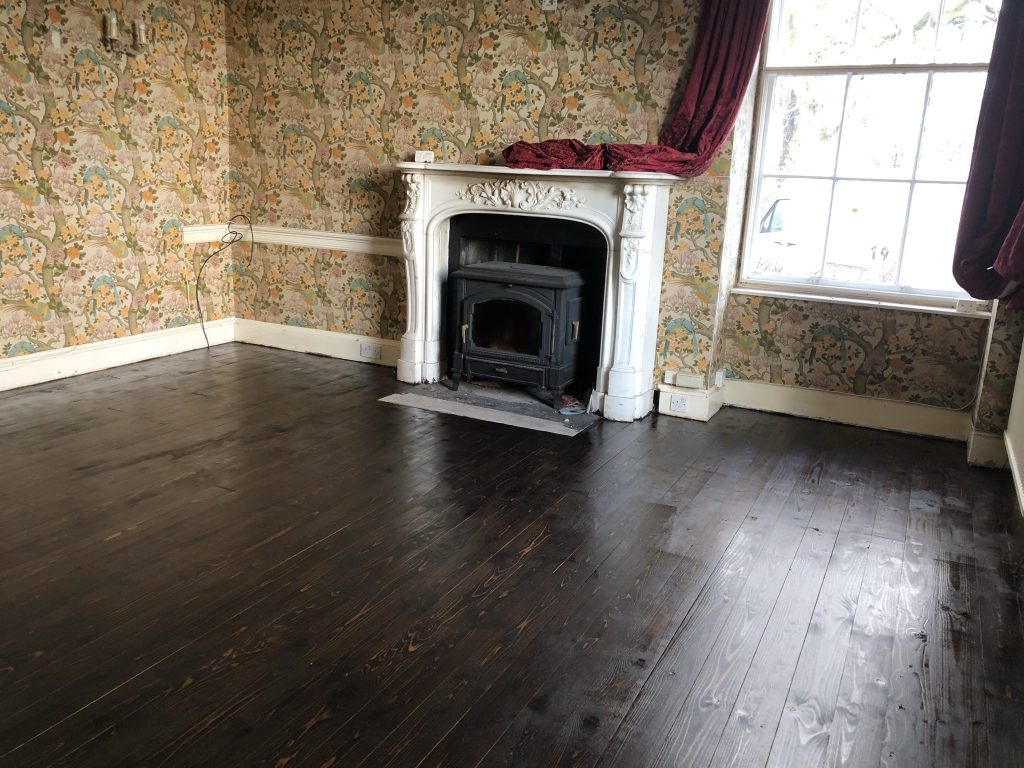
We had discussed a mid-brown with the team and I was a little surprised at the depth of the colour, but it’s hard to know exactly how a stain will take to a floor until you put it on. At this point, I wasn’t 100% sold, but we had committed and I decided to let the work take its course and see how I felt at the end of it. The team left at the end of the first day to let the stain cure with plans to return the next day.
On day 2, the team returned and gave the floor a quick wetting to get the nap of the wood up and applied the second coat of stain:
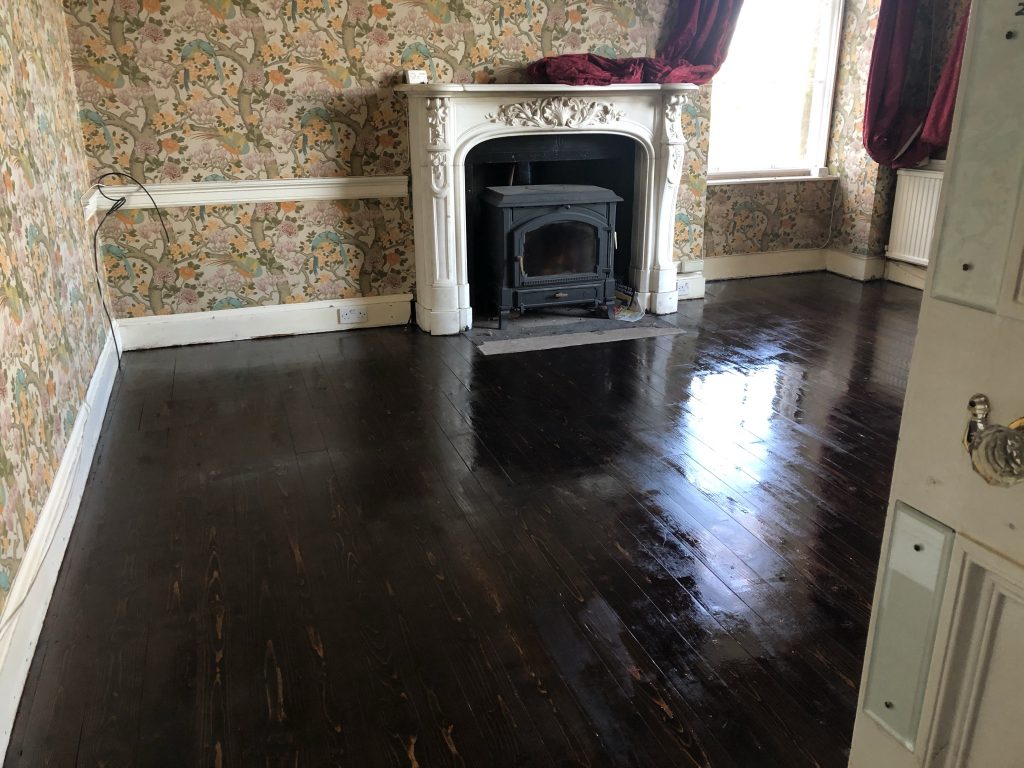
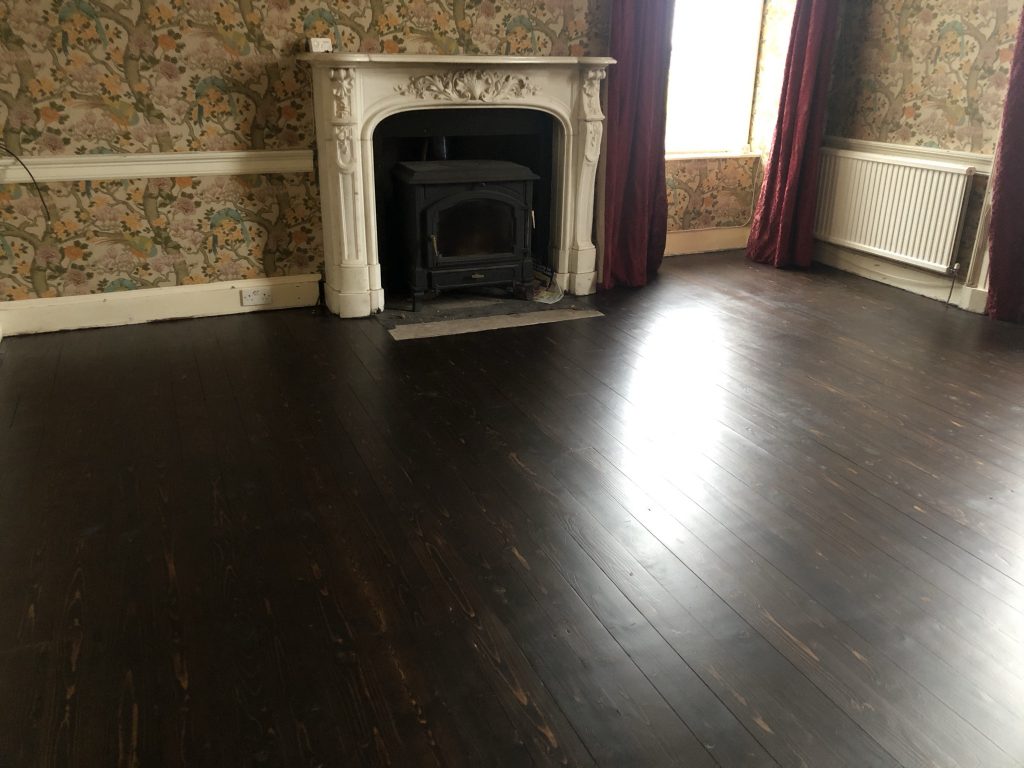
After that, Paul returned on day 3 to give everything a rough sand and buff, and to apply the top coat. After a 24 hour dry time, this is how the final product came out:
Overall, I’m happy with the project – though if I had it to do over again, I’d do two things differently.
First, I’d probably choose a lighter stain than this. I’ve made my peace with it, and we’re going to do the same finish in the adjacent dining room, which will tie everything together – but overall, I had hoped for something more like Antique or Spice Brown as opposed to Graphite.

Second, we chose a matte finish for the floor. Now that I’m living with it, I wish it had a bit more of a sheen to it.
That said, we’re both really pleased with the end result of the project – and even better, we still like each other, as we didn’t do it ourselves 😂
For the next piece, I’ll be writing about the second part of this project, which yielded some truly fascinating insights to the house history! 🥰 Until then, take care and stay safe, everyone!