Yesterday, like most Saturdays for us, was absolutely packed – in the space of 8 hours, we:
1. Laid almost 300 kg of wood chip (made from Bardmony trees that came down during the storms this year) around our rose hedge (rosa rugosa) to (hopefully!) stifle the ever-present nettles and sticky willy; last year, this was one of our worst weed areas and we are trying to avoid the (quite literal!) pain of dealing with it this year!
2. Filled in a sink hole that has somehow appeared in the front lawn (again, using our own homemade compost!)… From photos shared by the previous owners, it looks like there may have been a pine tree in that area at one point, so we think the roots may be rotting down and the ground is sinking in. It has turned into a rather unpleasant boggy area at the moment – no doubt, unhelped by the buckets of rain we’ve had the past few months.
3. Pruned some maple trees by the barn whose upper extremities had started to grow under the barn roof alarmingly.
4. Applied lawn sand to the croquet lawn to kill the moss that has taken over since last autumn – this is Chris’s particular bug bear 😹
5. Weeded the rockeries by the cottage and the dry stone dyke and the hosta border along the walled garden.
6. Reorganised a closet, shifted the dressers around in the dressing room, and moved a storage cupboard into my office.
Unfortunately, we didn’t manage to finish everything on our To Do list – we still had plans to start the Great Annual Stick Pick in the east woods and to spend some time chainsawing, but by the time we had gotten through everything above, both of us were feeling pretty sorry for ourselves and admitted defeat.
When I texted my sister about our accomplishments, she rather gleefully pointed out that we probably wouldn’t be able to move today – and while she wasn’t entirely correct, I doubt we’ll be venturing far from the sofa today, so I’m here to complete the second installment in the Master Bedroom Makeover series!
Last week, I posted about the process of redecorating the walls, cornices, and ceiling. This week, I’ll walk you through the renovation of the floor, which was a real hidden gem.
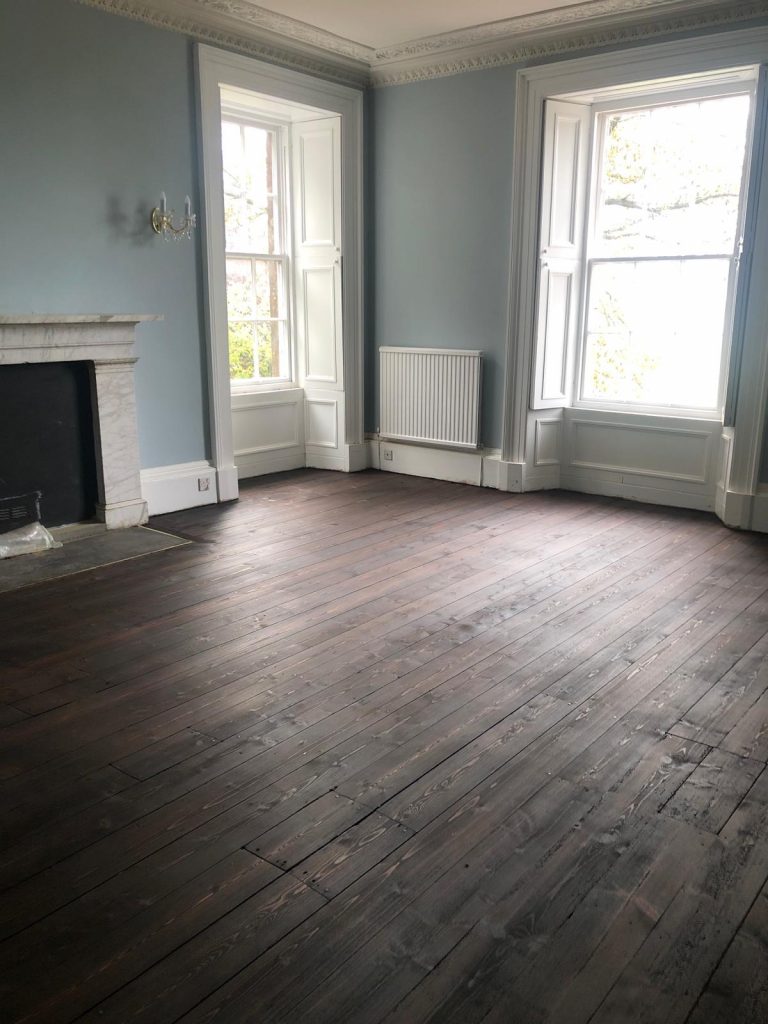
As a reminder, this is roughly what the room looked like when we took possession of the property in July 2020:
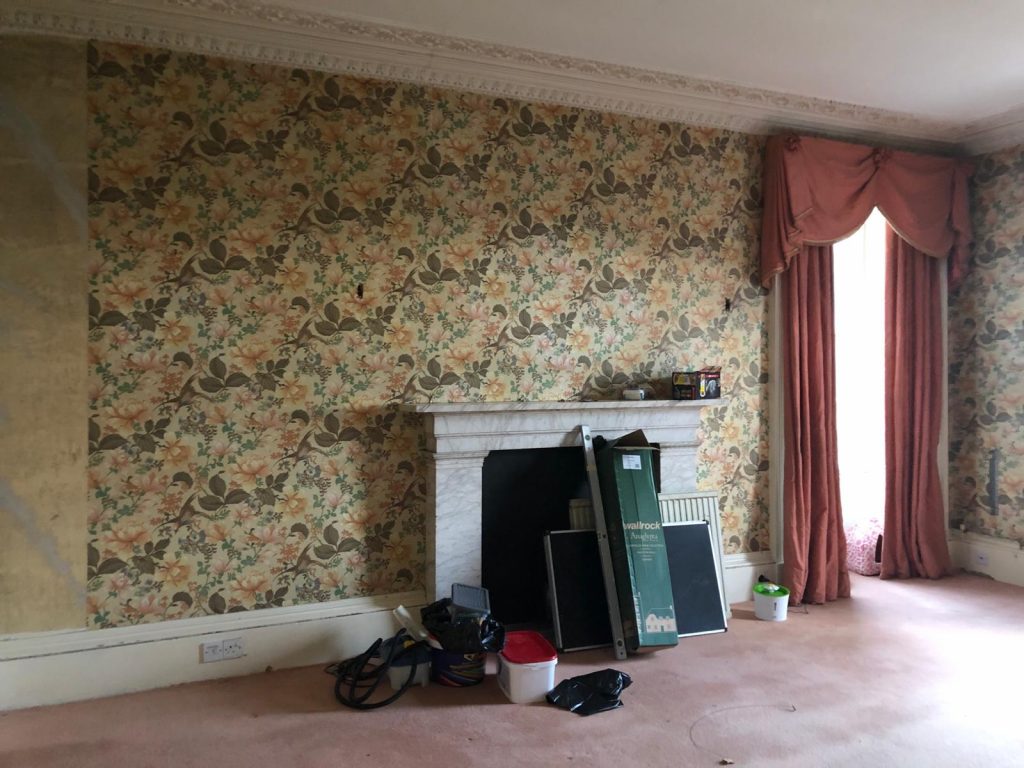
As you can see, the room was, at the time, carpeted with a high quality pink Wilton carpet. When this was originally laid in the early 1980s, it would have been rather pretty and feminine (pairing with the overall glam aesthetic of the space!), but 40+ years of use had left significant wear and staining, so we decided to remove it and assess from there.
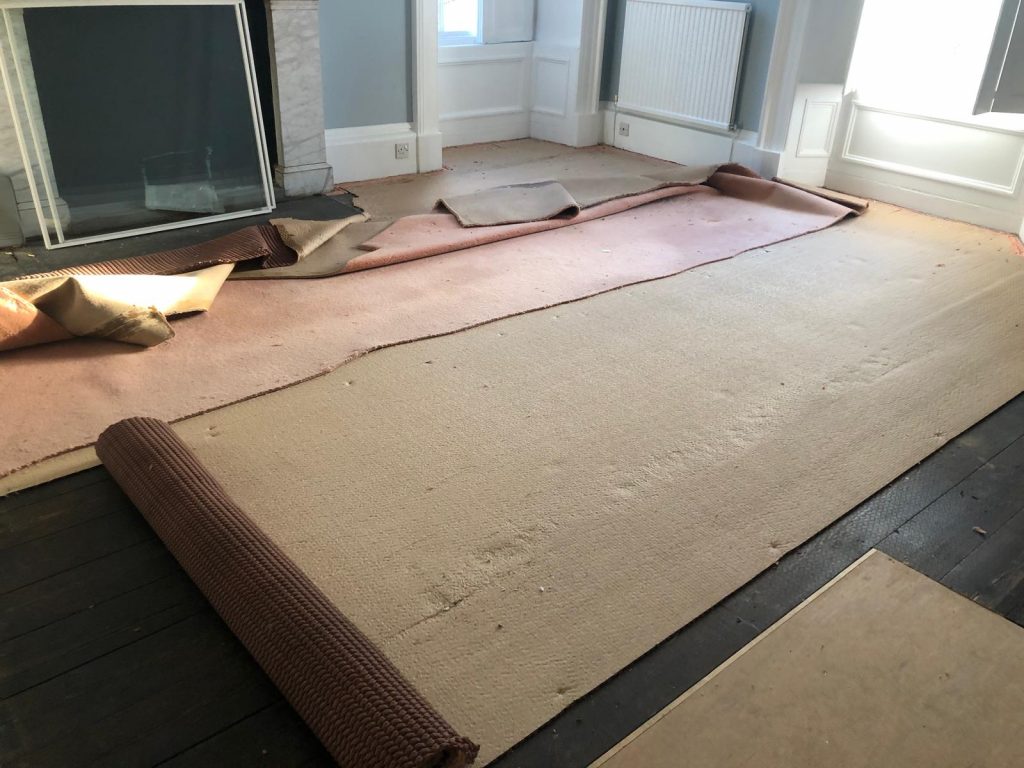
Suffice it to say, the removal process was really…not fun.
The room is massive to begin with (over 30 square meters/~325 square feet), and the carpet was from a 5m wide roll, extremely heavy, and full of dust, hair, and who knows what. Poor Chris worked with a Stanley knife to cut it into manageable scraps and I lugged it down the stairs. Then, once the carpet was out, we had to do the same for the unexpectedly dense rubber underlay – I didn’t even know they MADE rubber under lay until we took it out of that room!
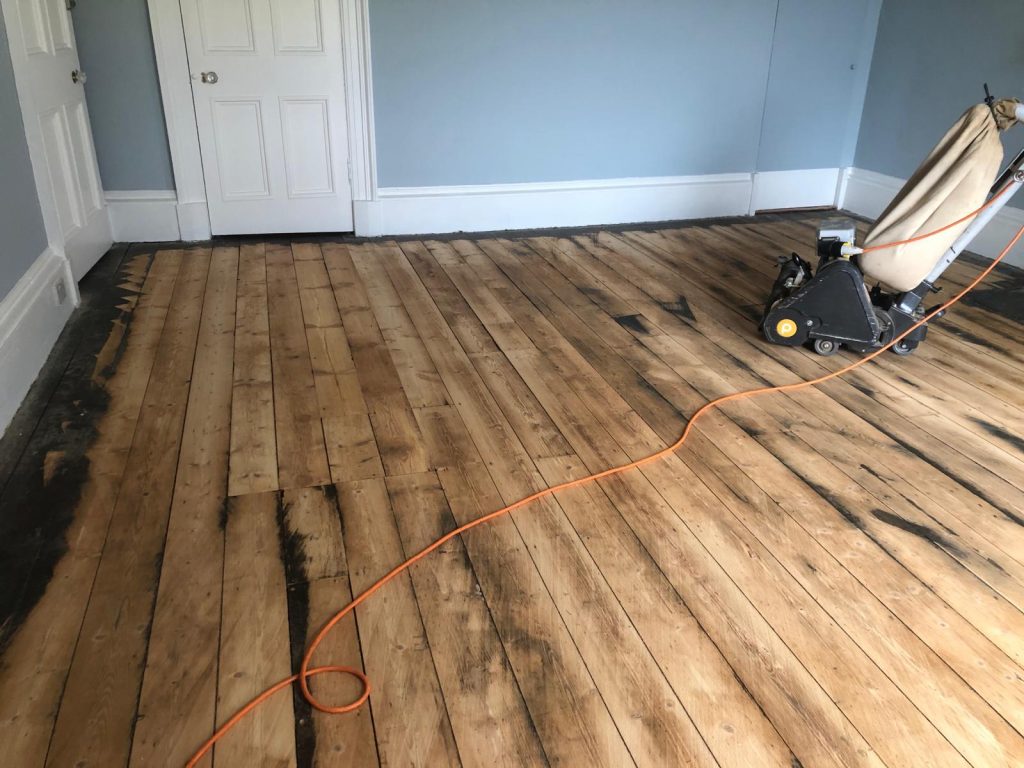
After the carpets and underlay were out, we (rather sweatily) surveyed the floor. It appeared that we had found original floor boards in fairly decent condition given that they were nearly 200 years old.
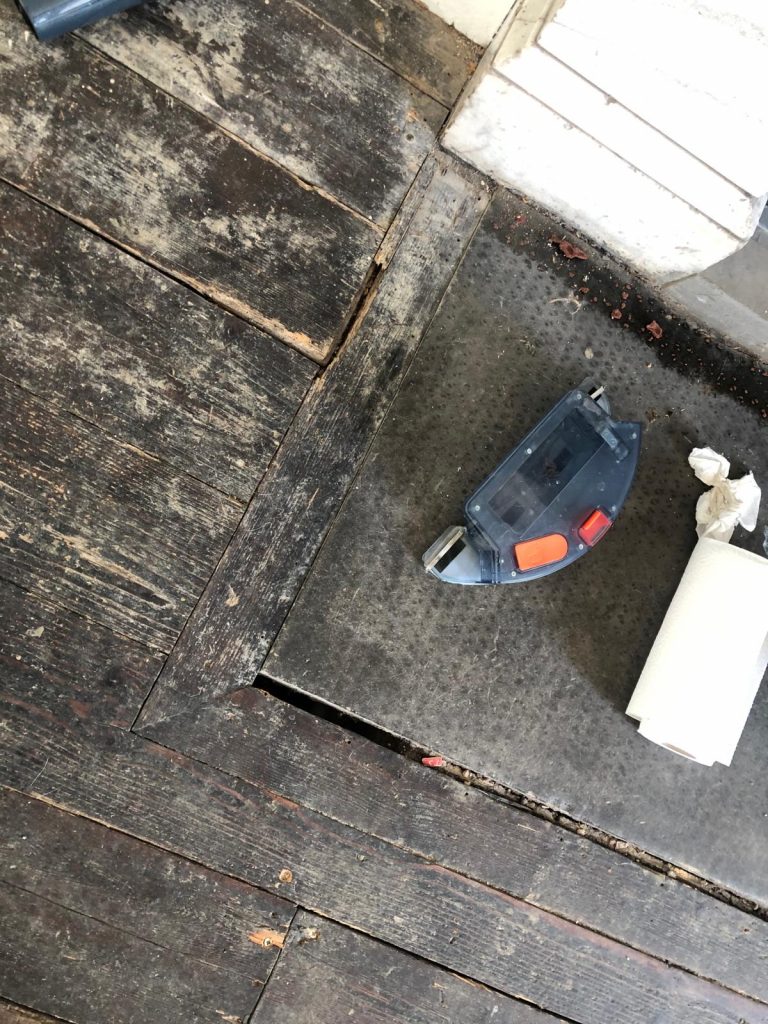
Unfortunately, as you can see in the bottom right of the photo above, some floor boards had been replaced with ply to facilitate the plumbing fit that took place in the 1980s. There were also a number of access hatches that had been quite shabbily cut. 😭
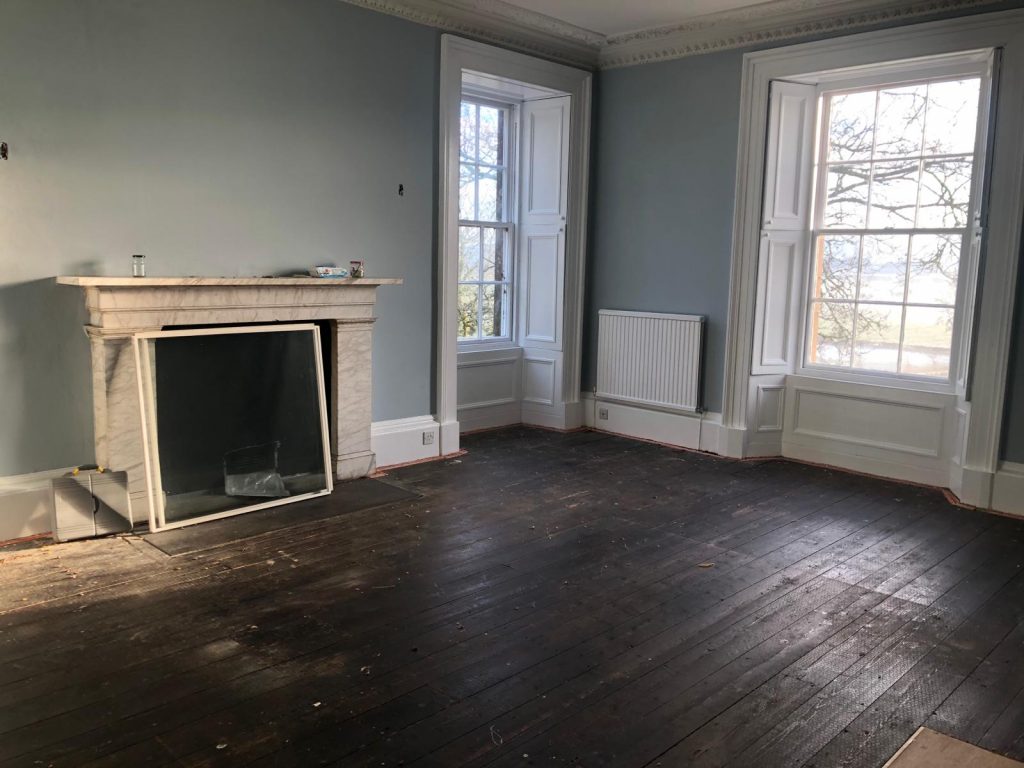
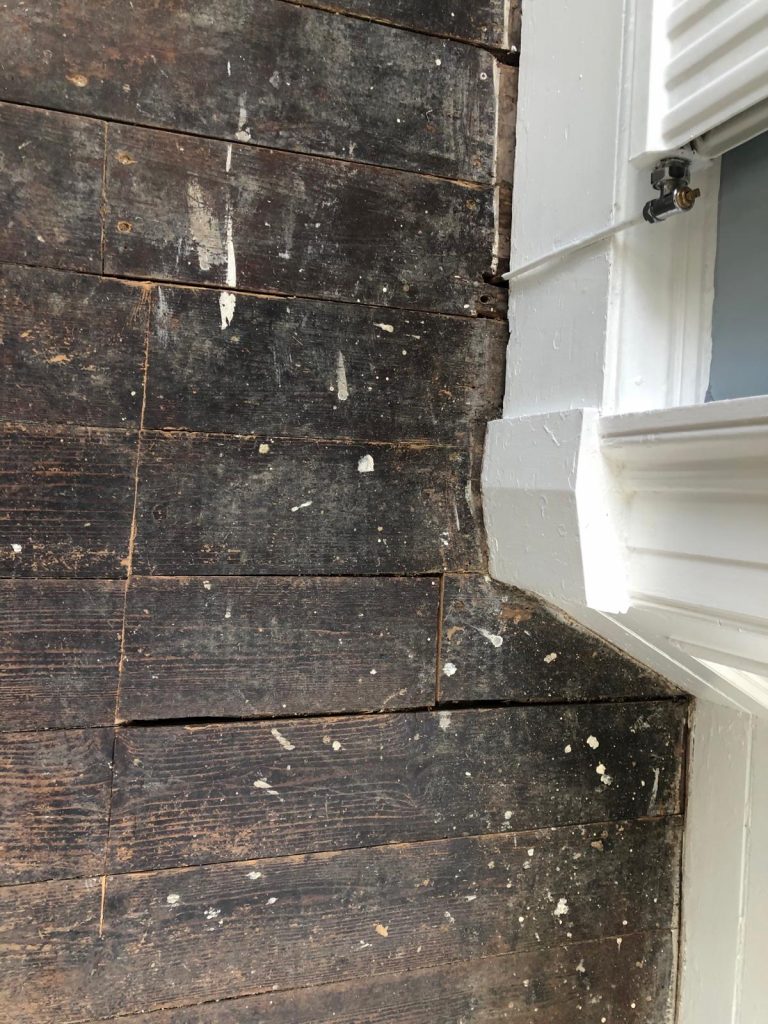
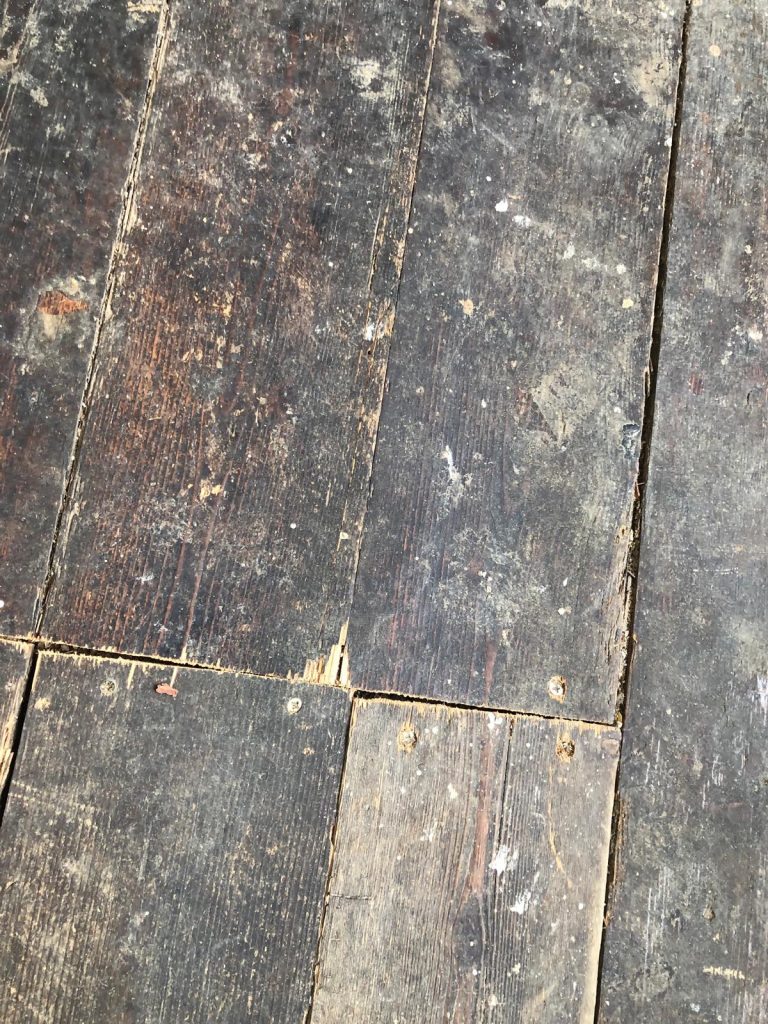
Our immediate inclination was to save the floor rather than to re-cover it. However, we first needed to determine whether we could address the hideous plywood debacle.
The first job was figuring out how we could find similar floor boards of a similar age. Thankfully, we had an idea. We are fortunate enough to have a boarded attic, and we wondered if any of those floor boards might be swapped in. Even more fortunately, we have a wonderful joiner (for the Americans: carpenter!) who lives just down the road, and he was happy to come give us an opinion.
After review, he determined the boards in the attic were of the same material and a similar width. He thought we’d be able to use them for filling in the gap from the removal of the ply, so we booked him in to do the swap a few weeks later.
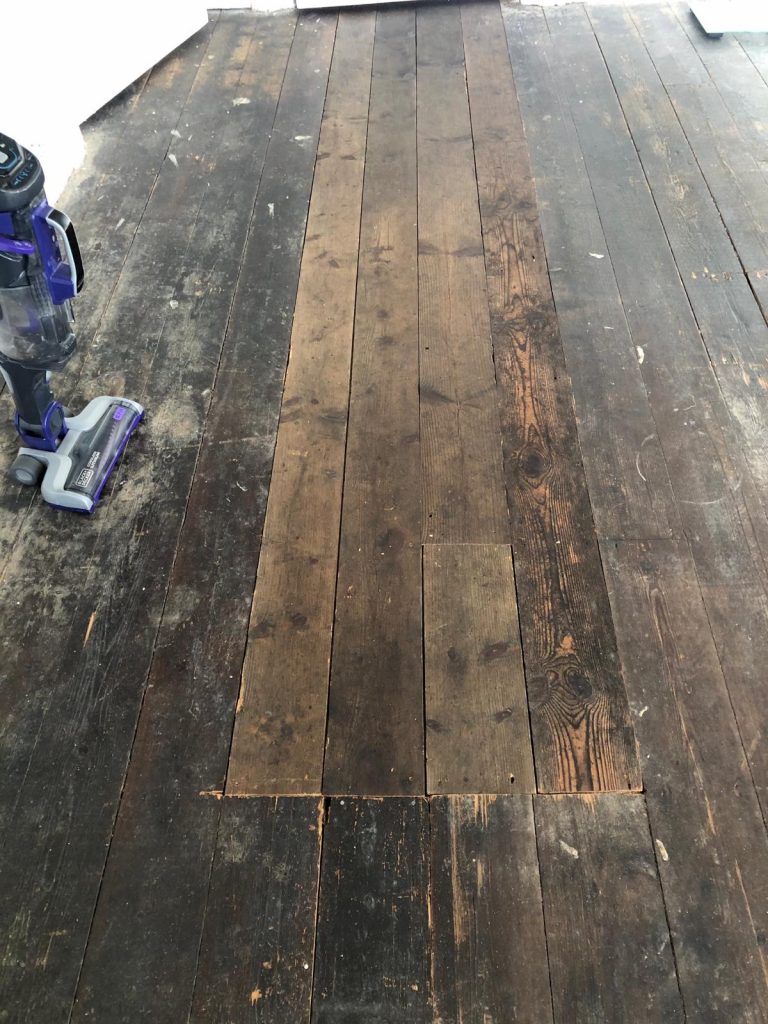
While they weren’t an EXACT match in terms of width, the patina of the attic floor boards was very similar and they blended well with the original floor boards. Certainly better than anything we could buy off the shelf, at any rate!
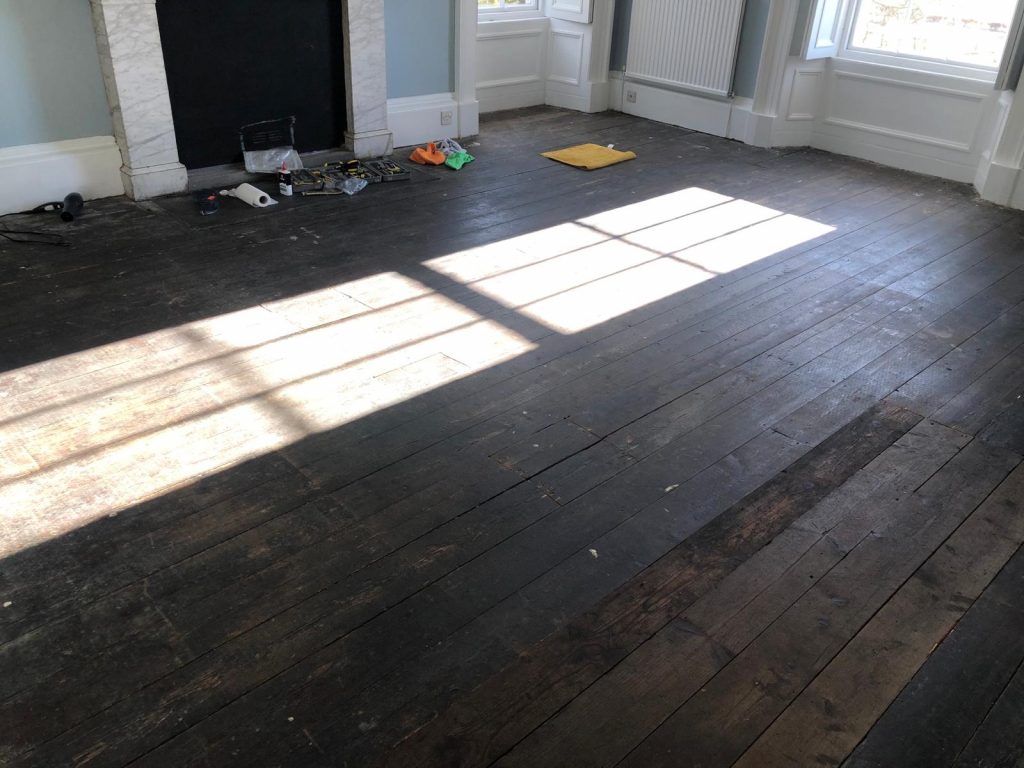
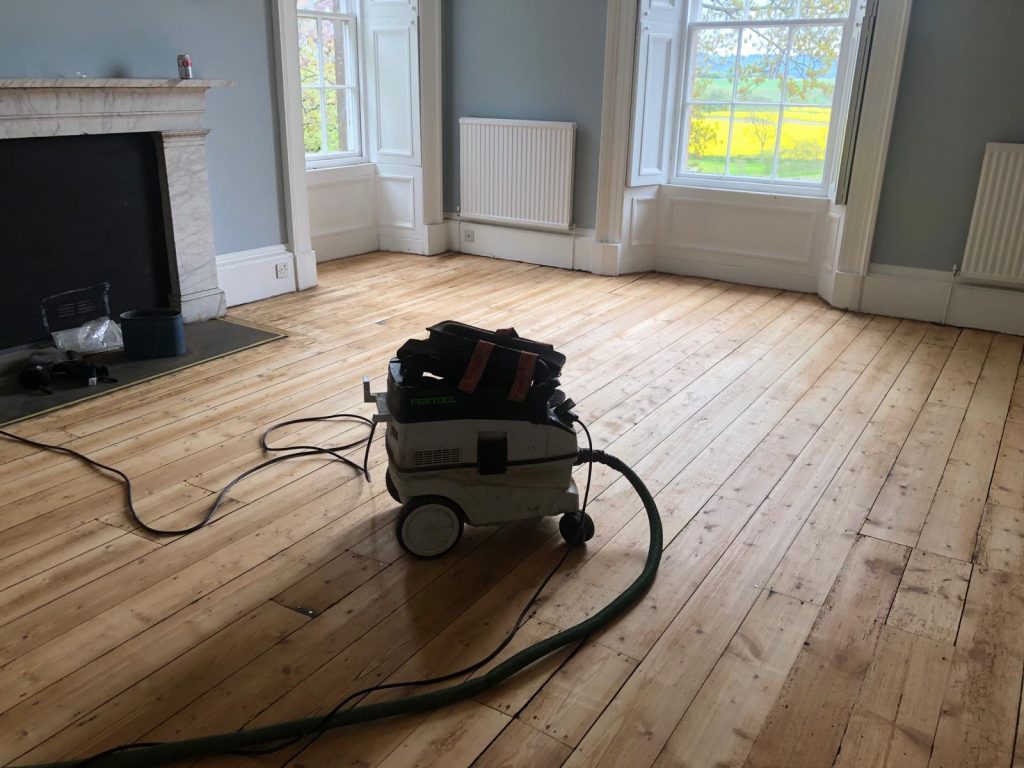
Now that we knew our idea for renovating the floor was really feasible, we booked in the same team that finished the floor in the study to sand and refinish the bedroom for us and began the never-ending job of removing the remaining underlay staples from the floor in prep for their arrival.
As before, the floor team started with a good sand of the floor boards.
Then, they applied the first coat of the stain. We decided that we would keep all the wood floors in the house the same colour, so we used the same stain we used in the study for this floor.
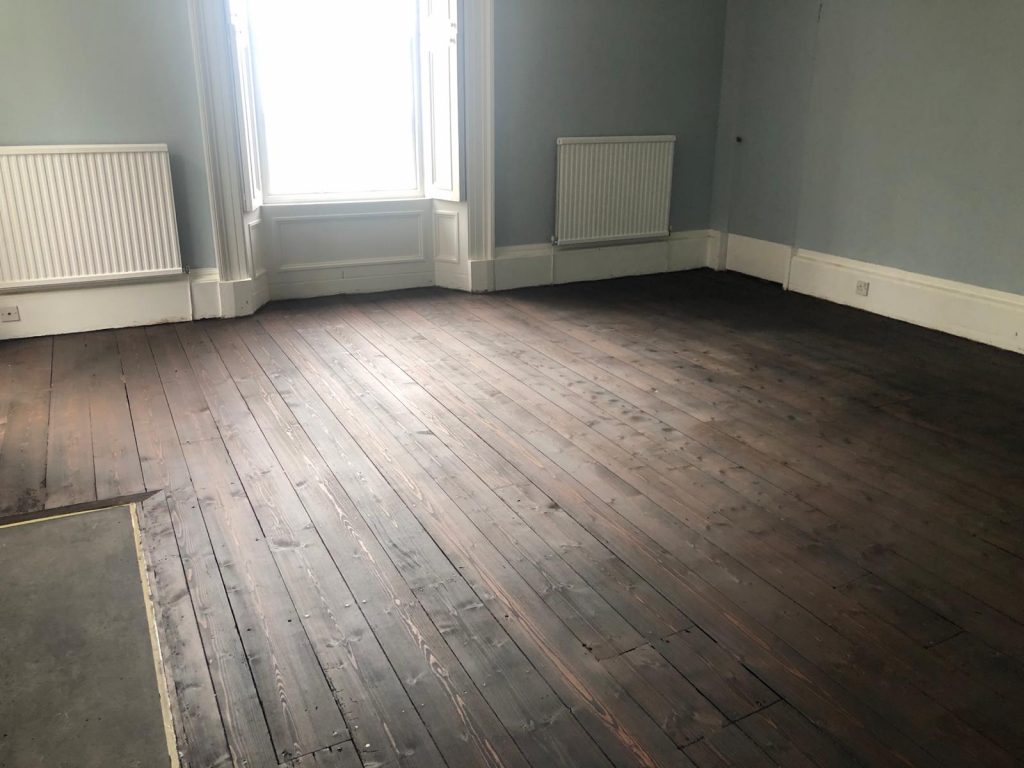
At this stage, everything was blending in really well – the access hatches were not overly noticeable, and the attic floor board differences had virtually disappeared.
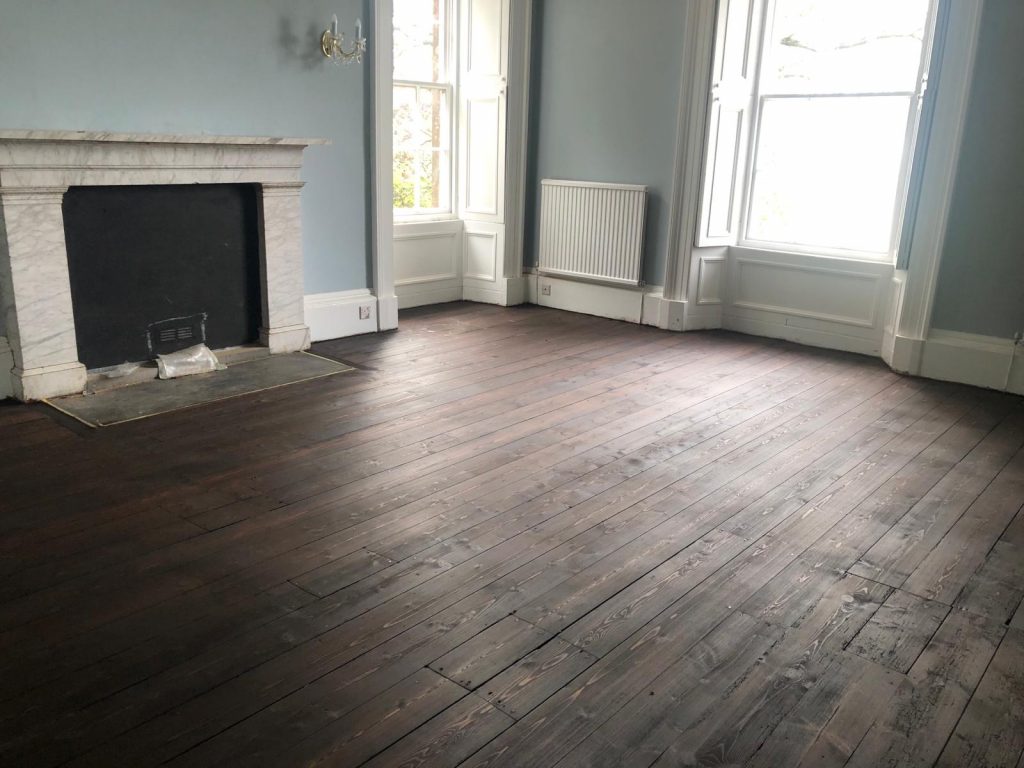
For the study, we went with a matte finish for the floors, but after a few months of living with it, we had decided we wanted a sheen for this floor, so the team continued the process by applying a satin finish to the floor.
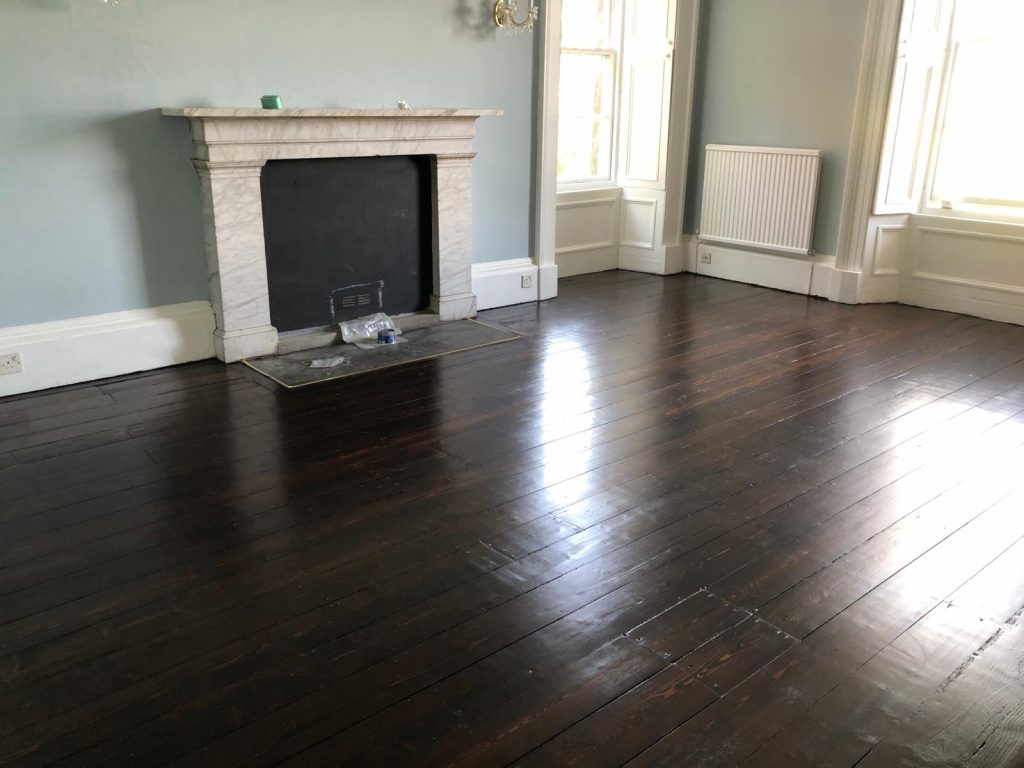
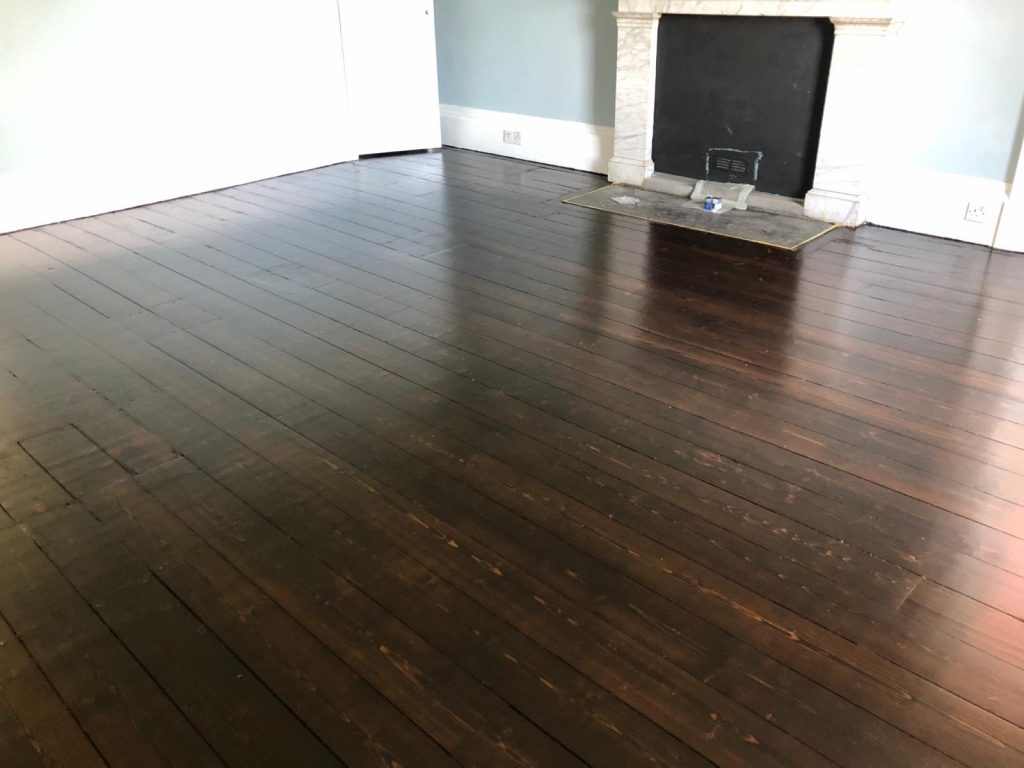
Now, isn’t that just G-O-R-G-E-O-U-S?! Amazing to think those were under that pink carpet the whole time. Totally worth the pain and effort of removing the carpet and underlay and thank goodness we had the idea of using boards from the attic to replace the ply.
The restoration of this room was the project that really started to make this house feel like it belonged to us not just on paper but in our hearts – it was just so special to bring these floors back to their former glory.
So, what does the room look like now?
As it happens, I don’t actually have any photos of the room with its current furniture/arrangement (and it isn’t clean enough for me to take any today! 😹). We also still have a few minor fixes to do and haven’t yet hung any art, as we want to mount brass picture rails and we won’t do that until after we touch up the damage from the trades that renovated the en-suite (a whole separate post or three😬 ).
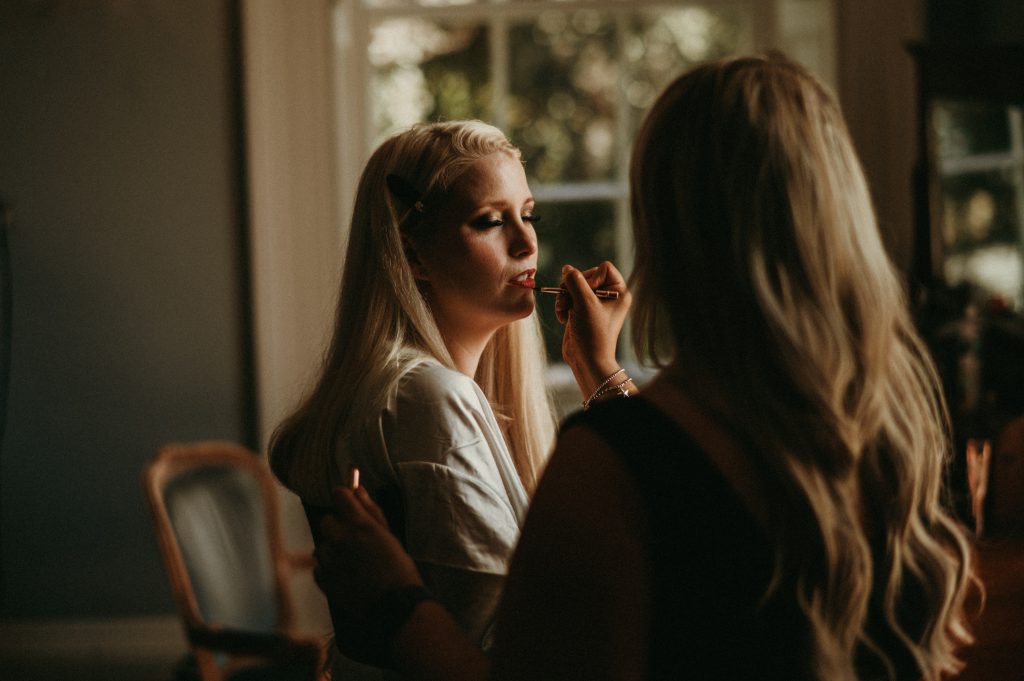
However, I do have a few photos from the wedding that show the room as a backdrop, so I’ll share those with you for now [photo credit: Andrew Rae].

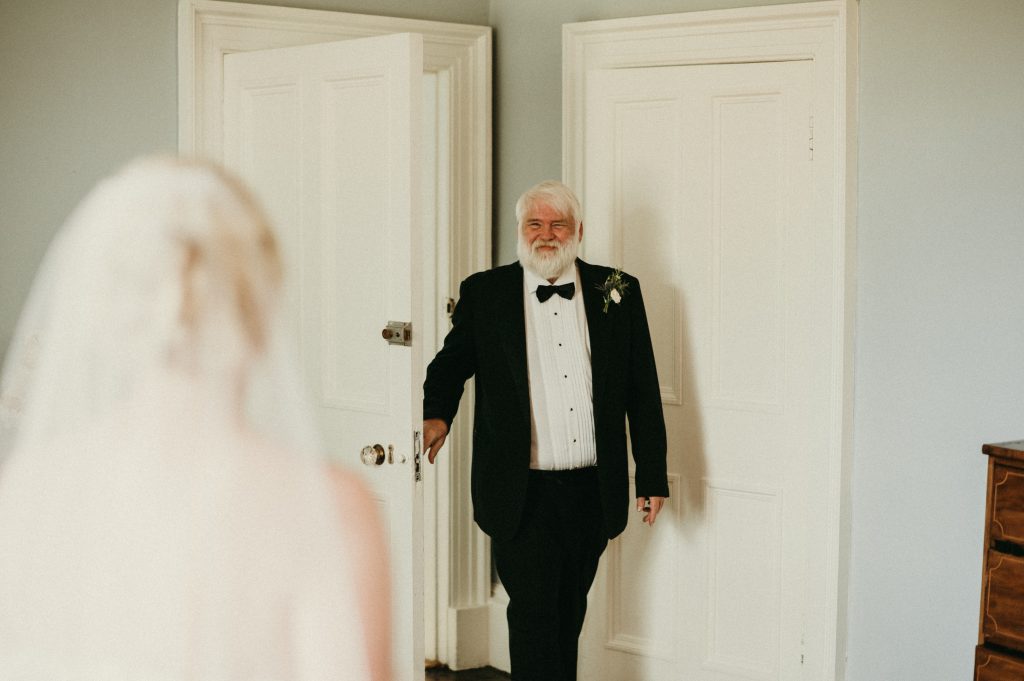
I will also tease you with a little shot of the bed we commissioned for this room.
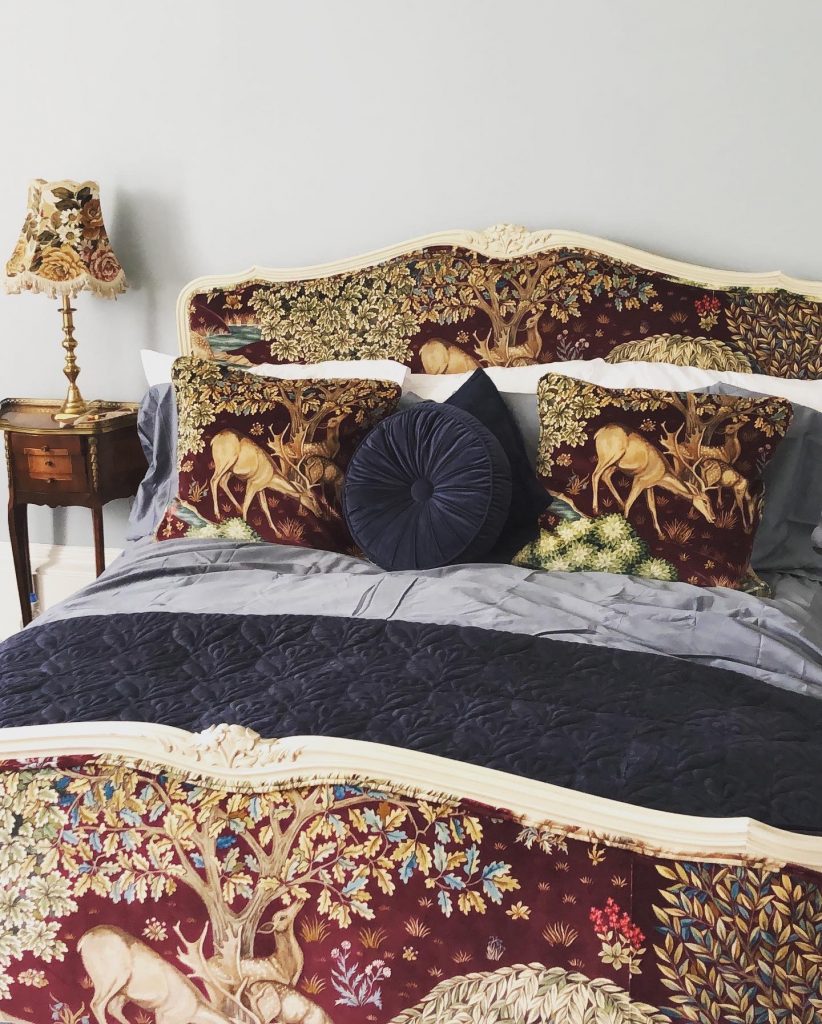
This is an antique French bed that was reupholstered for us by a wonderful lady down in Yorkshire. The fabric, obtained for us by Chris’s Auntie Jilly) is The Brook by William Morris in tapestry red and is a delightfully soft velvet. We chose it for this room because of the pale blue accents and we adore how it looks in this space (even if Chris could wish the antique frame was just a SMIDGE longer, poor dear!).
So, there you have it – the restoration of the floor, a few wedding photos, and a teaser of the bed, to give you an idea for the general ‘feel’ of the room – I promise to share some finished photos when we finally get everything tidied up and art on the walls 😹
I hope this entry was worth the wait, and I wish you a wonderful rest of the weekend, wherever you are!
I love reading your blog even though I see every week how you have transformed your house -you have done wonders x
The bed is a piece of art ❤️ I love the color of the walls and the wood floor is amazing . Great job you two.